Sustainer
Table of contents
- Overview
- Goals
- Application Design
- User Guide
- Community Feedback
- Developer Guide
- Development History
- Team
Overview
What is Sustainer?
Sustainer is a reusable container tracking app that helps users and the non-profit Zero Waste O’ahu stay accountable for the return of reusable takeout containers at large events. The initial Full Cycle Takeout pilot program, responsible for creating and renting out reusable takeout containers, has already shown promise in reducing waste for restaurants, but has struggled with the return of the containers. This makes the program unsustainable financially and unsustainable for the planet. Failing to solve this problem leads to more one-time use products becoming trash and more reusable containers needing to be produced. Sustainer aims to solve this problem by providing a platform for Zero Waste O’ahu to track rented out containers and provide incentives for their return.
Goals of the app
Our web app aims to provide the following features:
Application Design
The following describes the design process for our app:
Data model
The data model for Sustainer consists of two “primary” collections (Accounts and Containers), along with one “join” Collections (ContainersByRole) and one supplemental collection (Credit Card).
We decided to present the model in this way to easily keep track of the ownership for each container. Here are some reasons for our design:
- The role field has possibilities of user, vendor, or admin, which will indicate the navigation routes of UI pages upon log in. It will also be used to transfer ownership of a container from an admin (organization worker) to a vendor to a user (customer at the event).
- The CreditCard collection allows us to link a payment method as collateral for the containers that are ordered. In the scenario where they don’t return the containers after the event is over, they will be charged accordingly.
- Multiple containers can be assigned to a single user. The ContainersByRole join collection help us to easily filter the number of containers by a specific user or owner when an admin/moderator wants to check which containers are available and returned.
Here is an example schematic of the database:
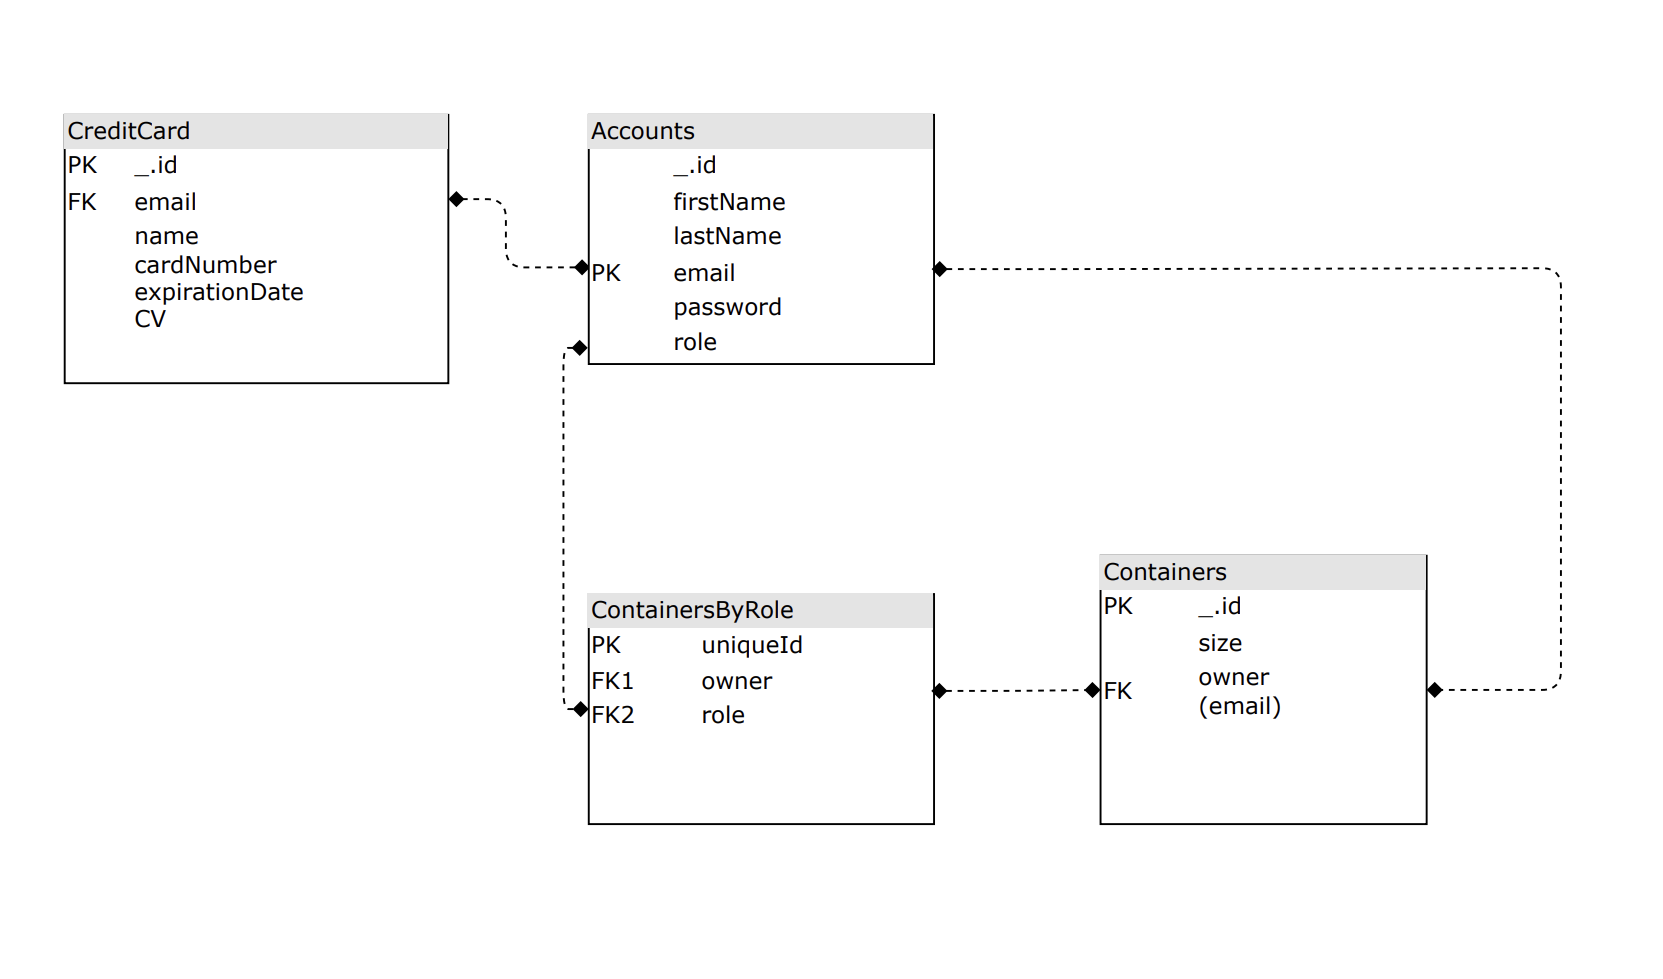
The fields labeled PK (Email for Accounts) indicate that this is a unique value so that they can be used as a primary key for that collection. This constraint is enforced in the schema definition associated with that collection. The label FK represents the foreign keys that are used from other collections.
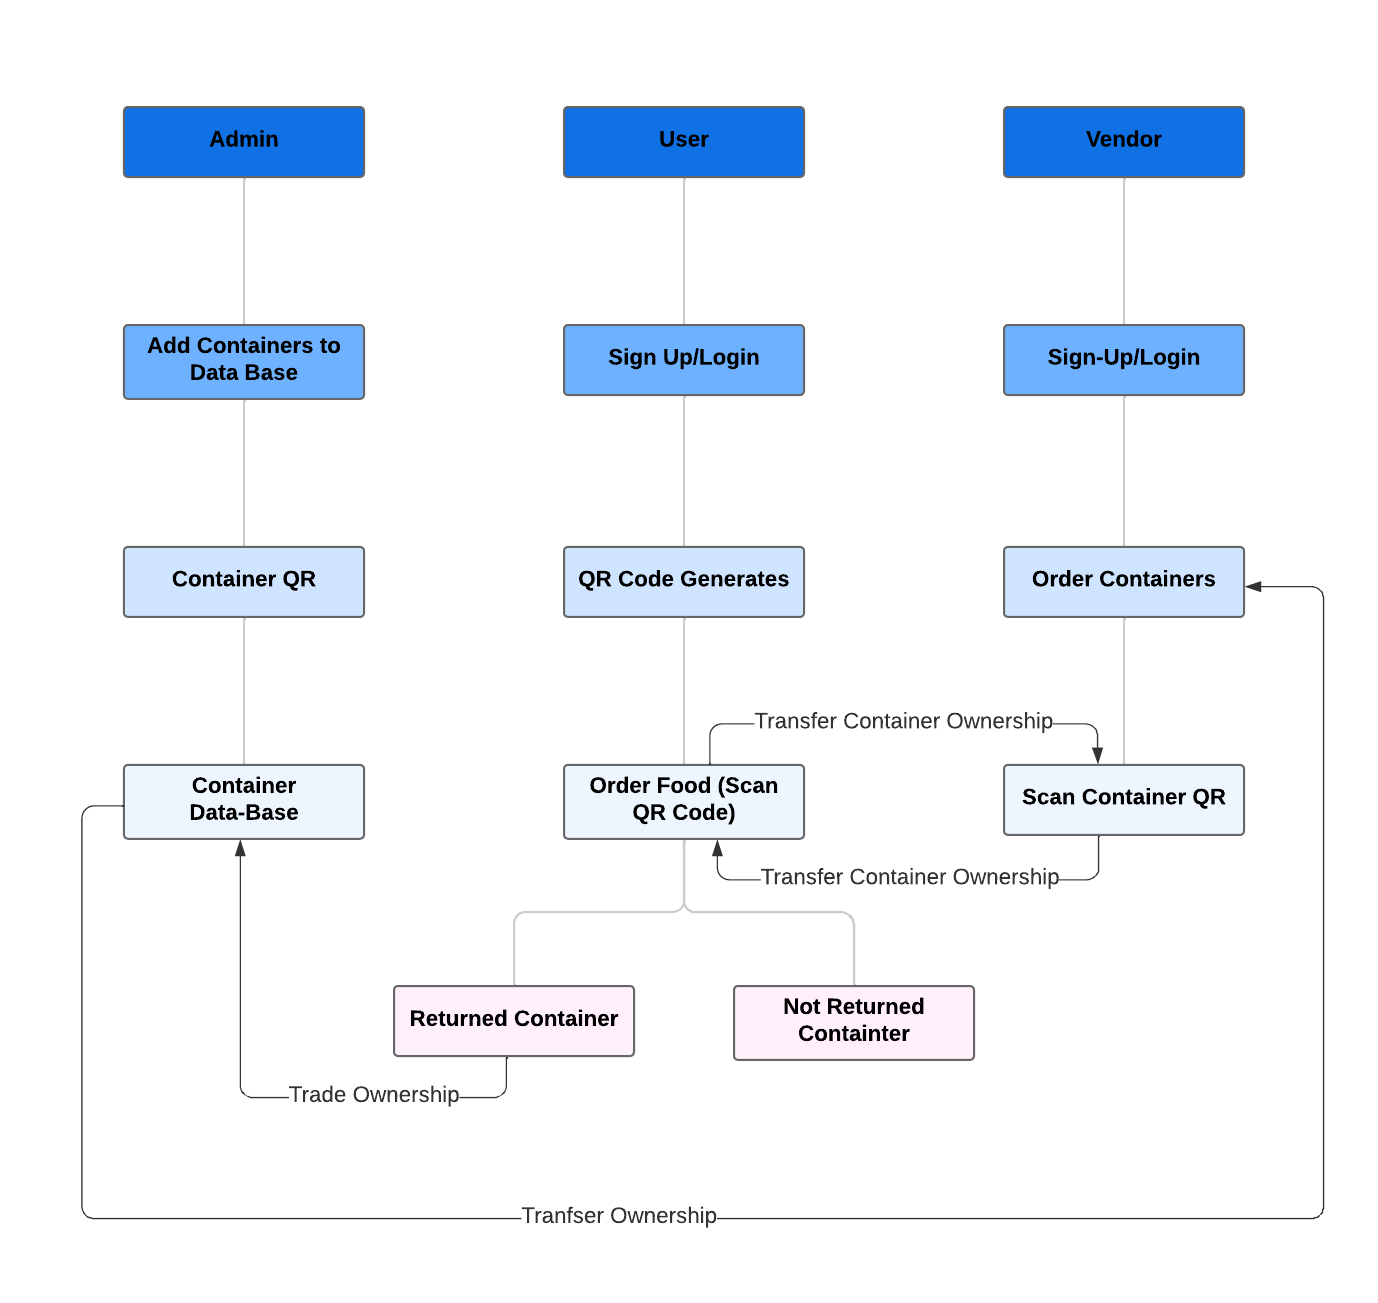
Application Flowchart
User Guide
This section provides a walkthrough of the Sustainer web app including its user interface and its capabilities.
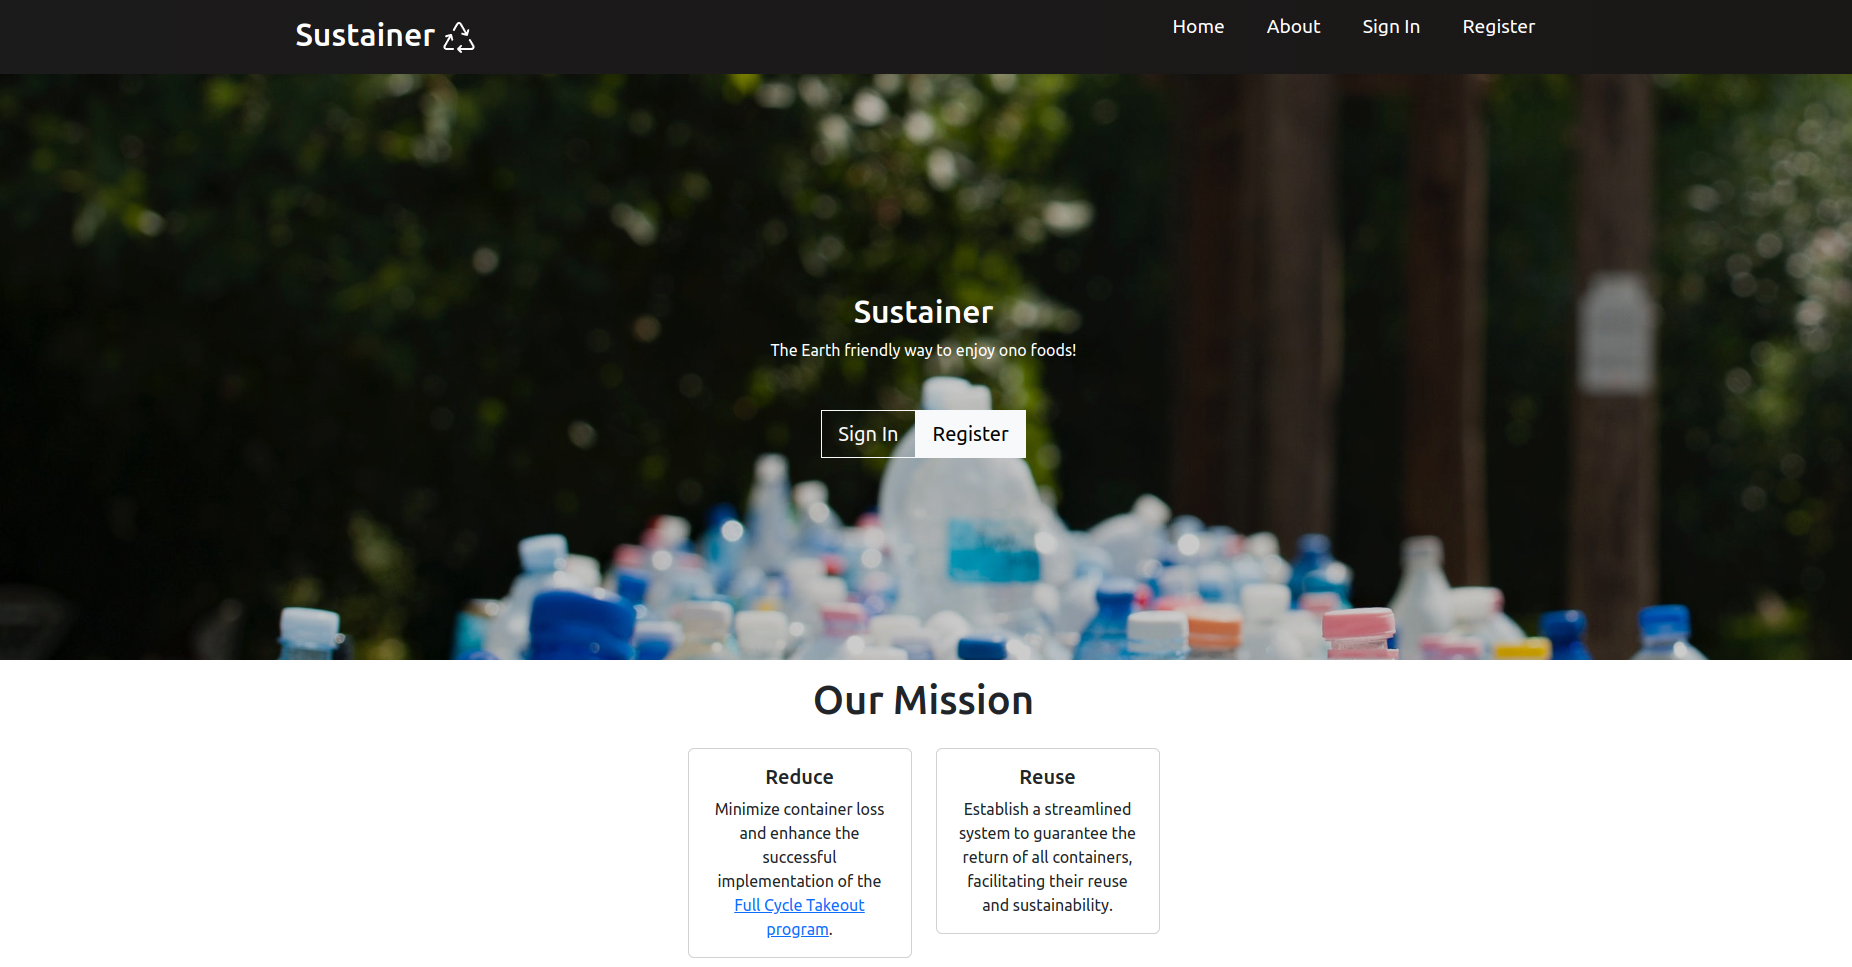
Landing Page
The landing page is presented to users when they first visit the site. It provides a brief overview and purpose of the app.
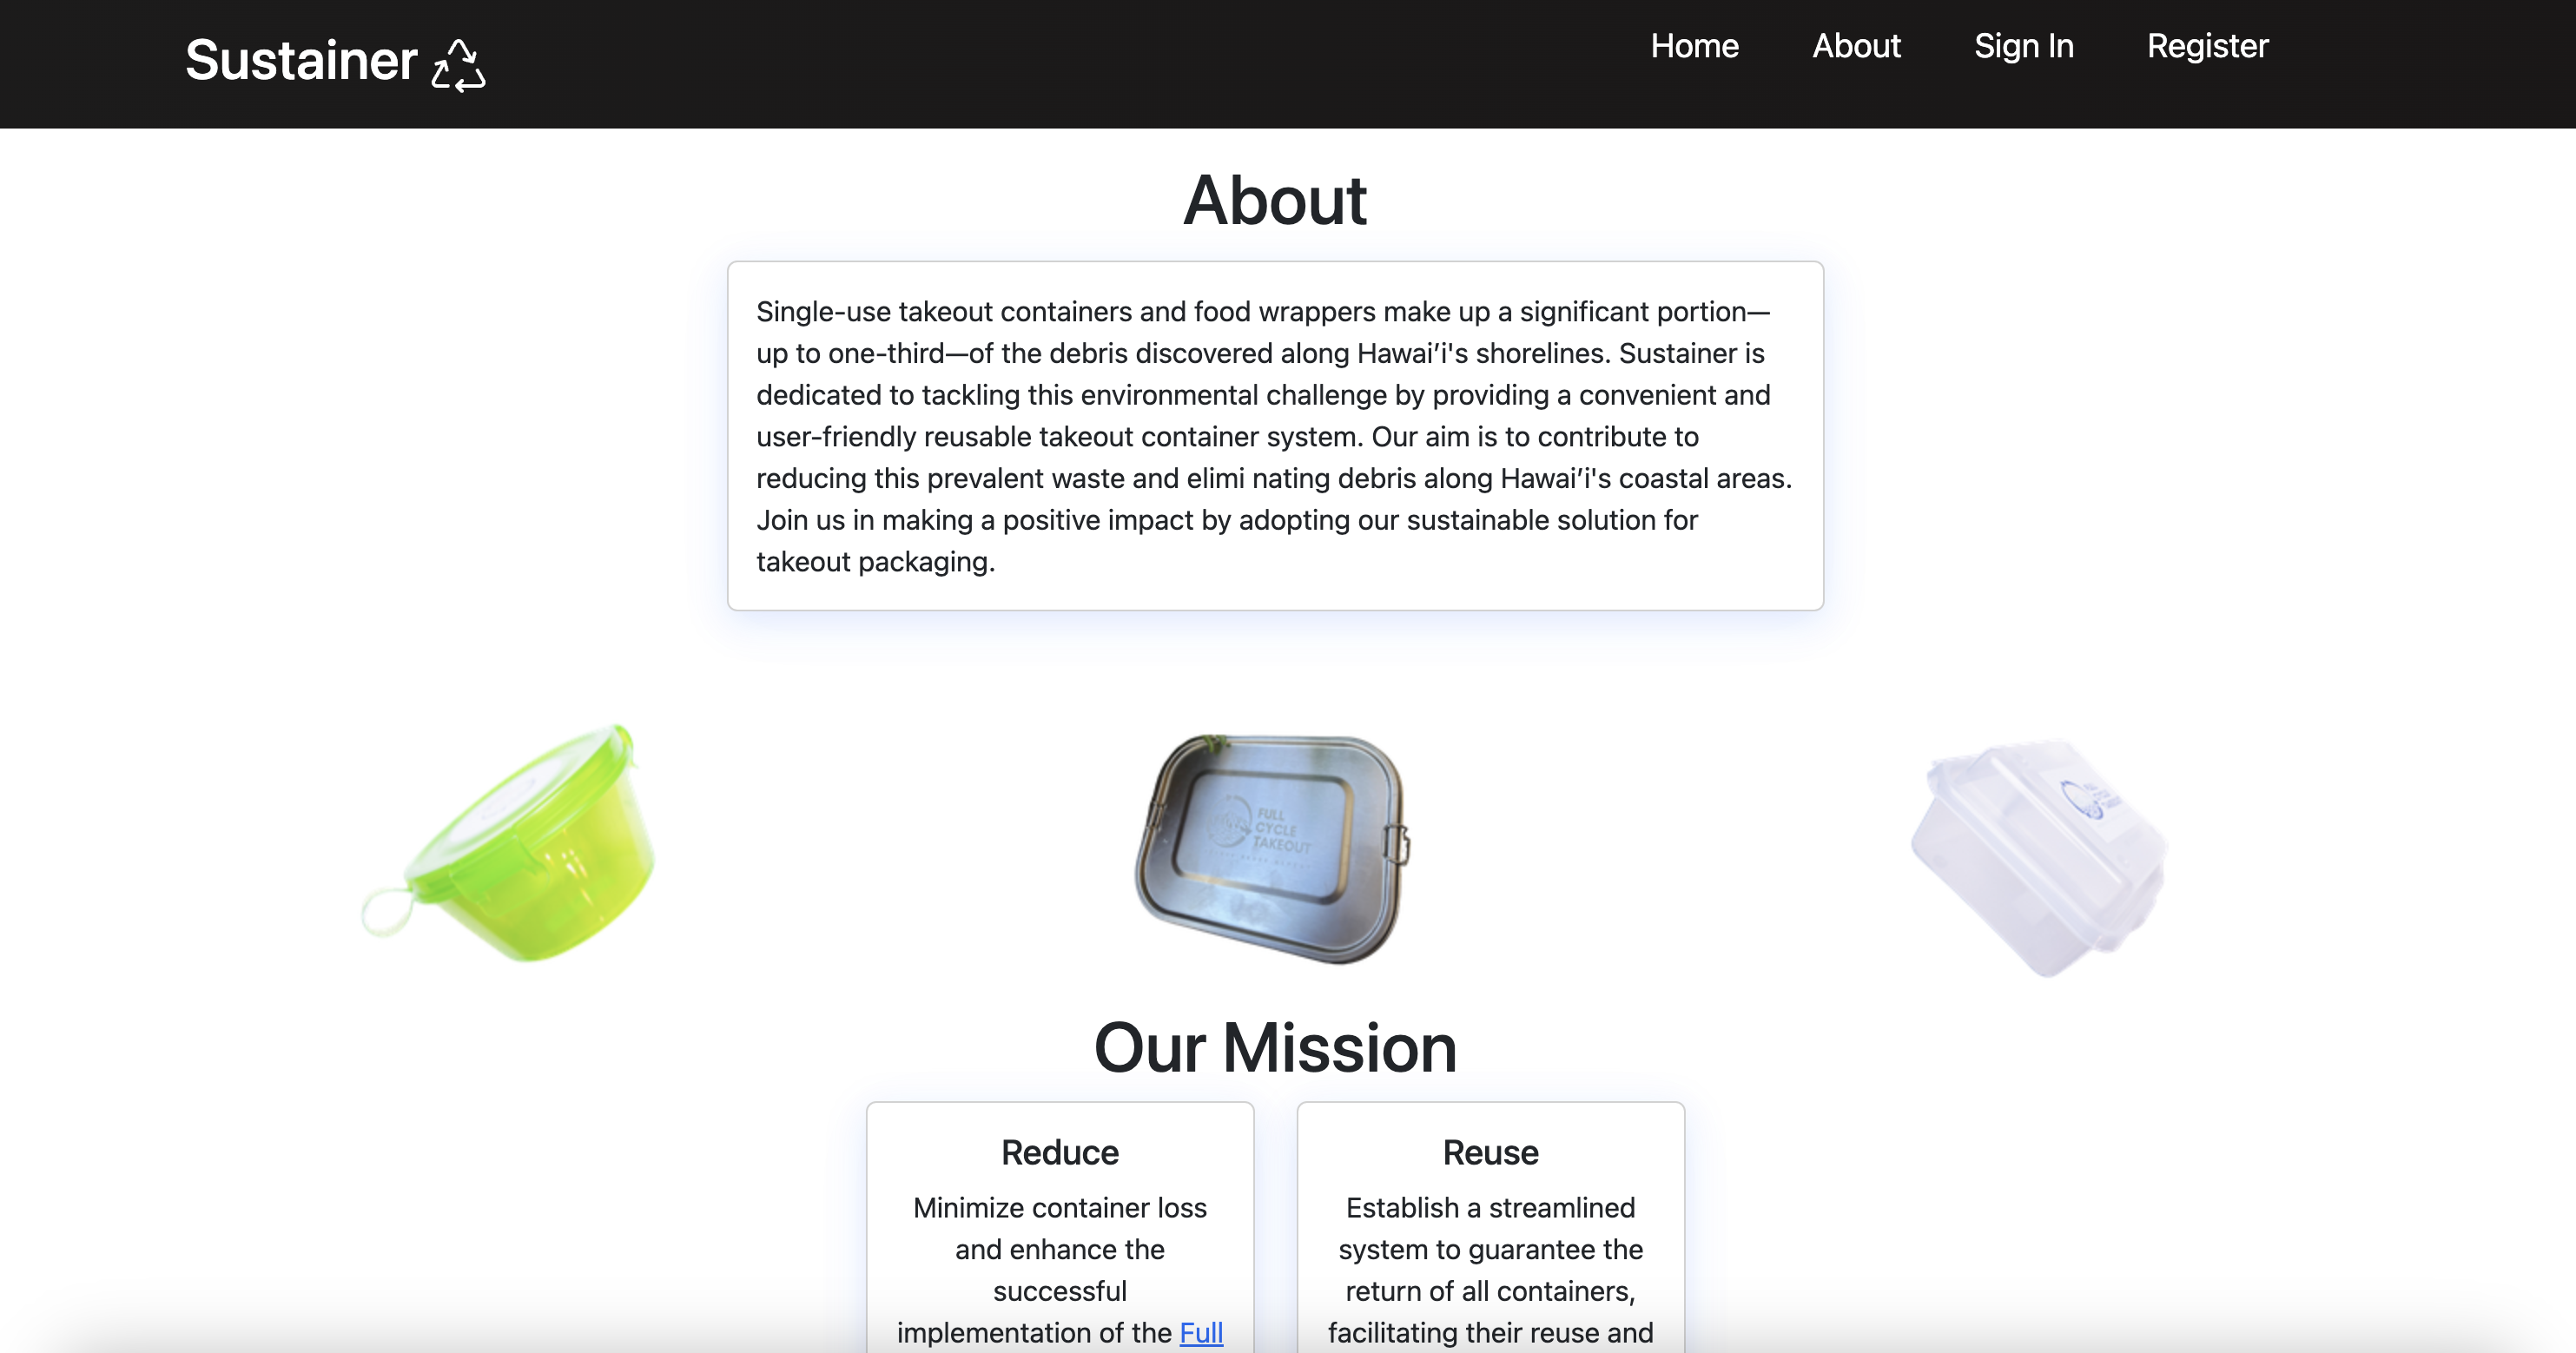
About Page
Clicking on the “About” nav link in the navigation bar will direct the user to the About page. This page briefly describes the issue and possible solution to sustaining the environment through reusable takeout containers. There is also background information on the nonprofit organization “Zero Waste Oahu”, which helps facilitate a full cycle takeout program to users at large public events.
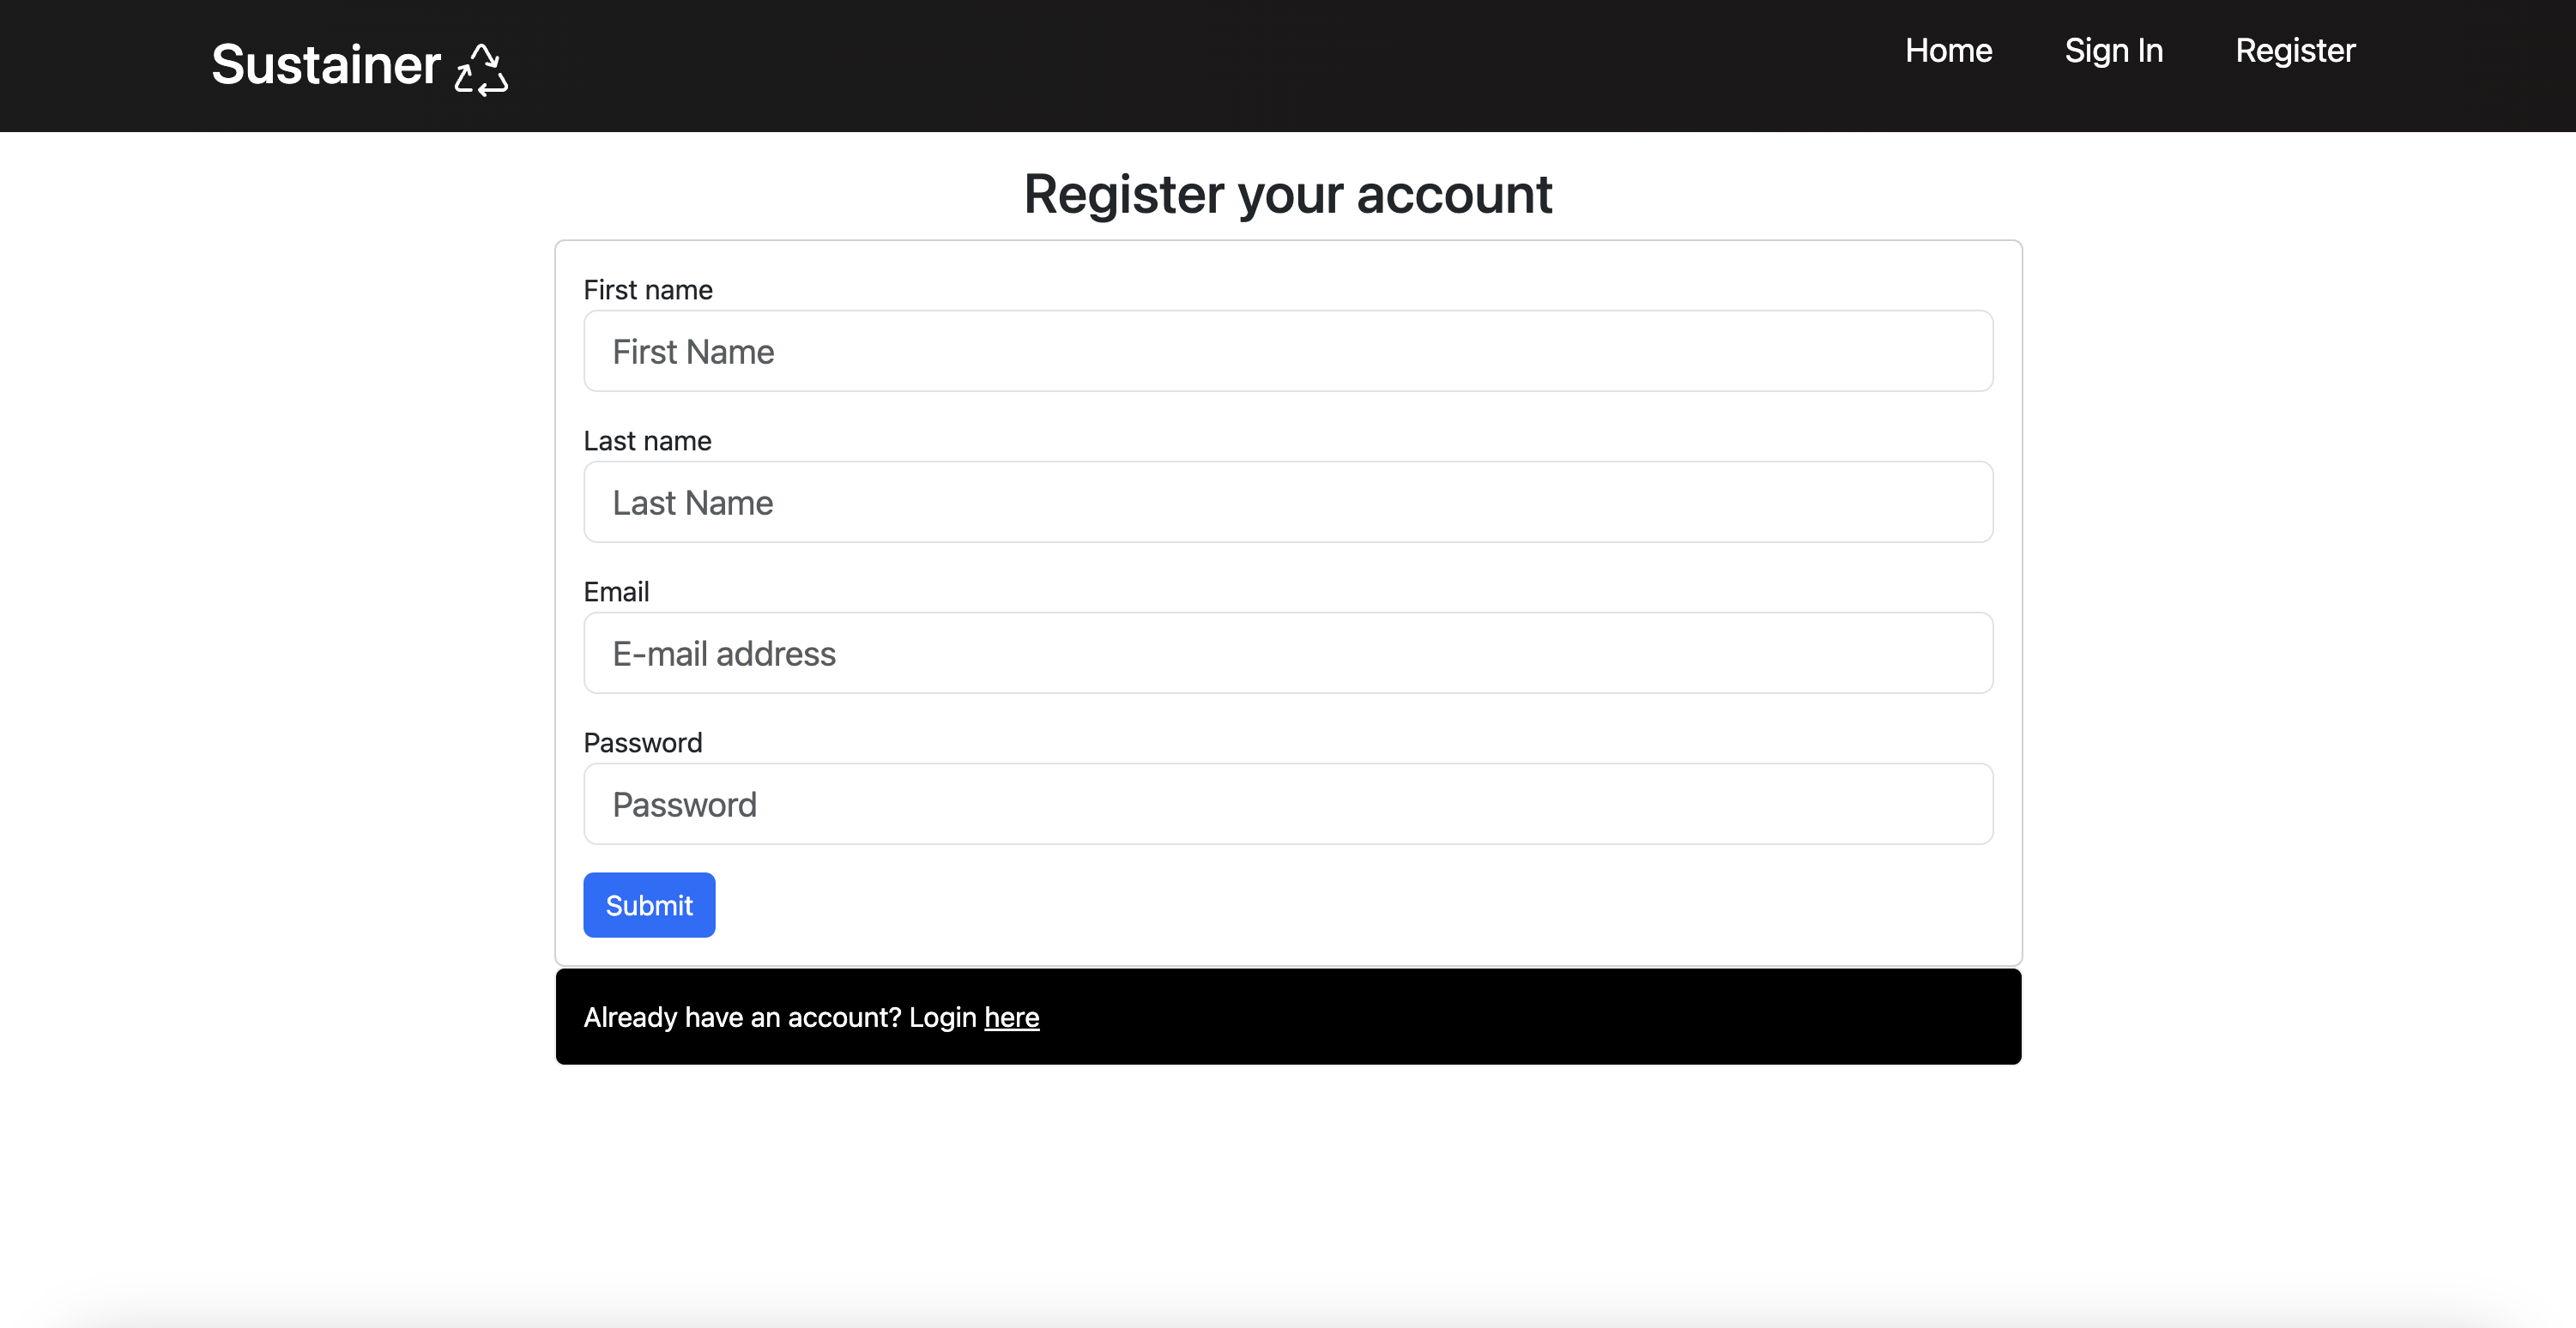
User Registration Page
To order the reusable containers at events, users must sign up by clicking on the “Sign up” dropdown menu in the upper right corner of the navbar. This registers the user into a system at a certain event and generates a QR code to act as an “ID” for the event.
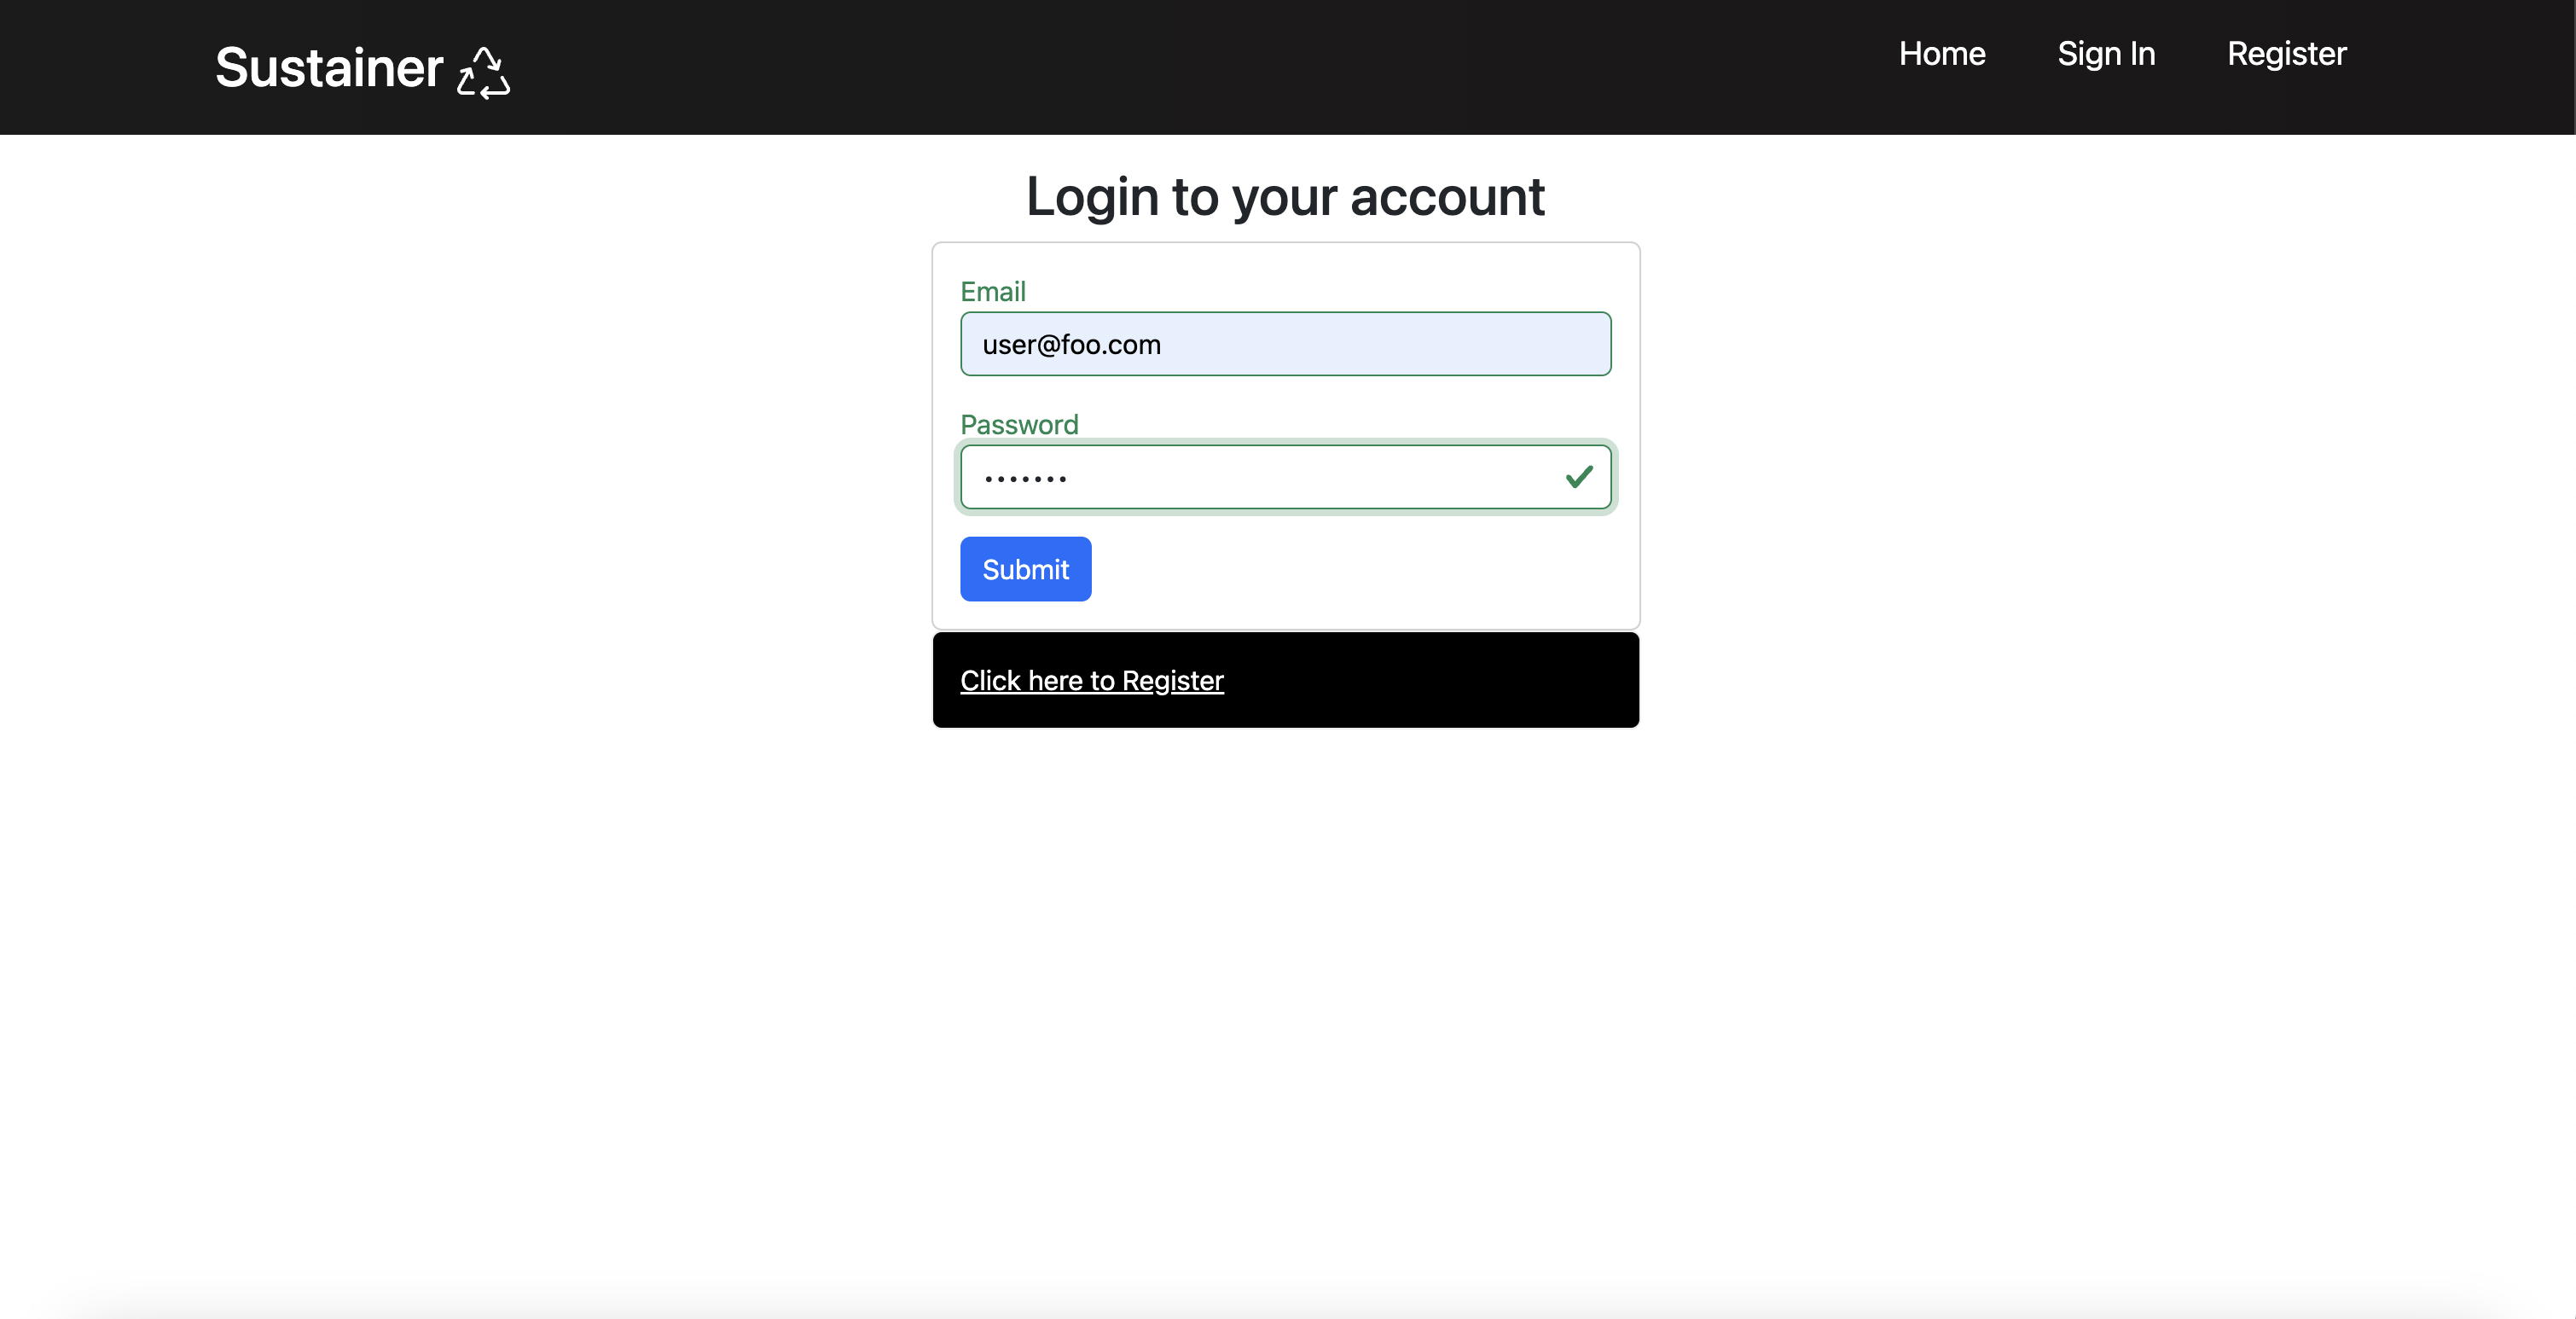
Login Page
For returning users, click on the “Login” button in the dropdown located in upper right corner of the navbar, then select “Sign in” to go to get your newly-generated QR code for the event. You must have been previously registered with the system to use this option:
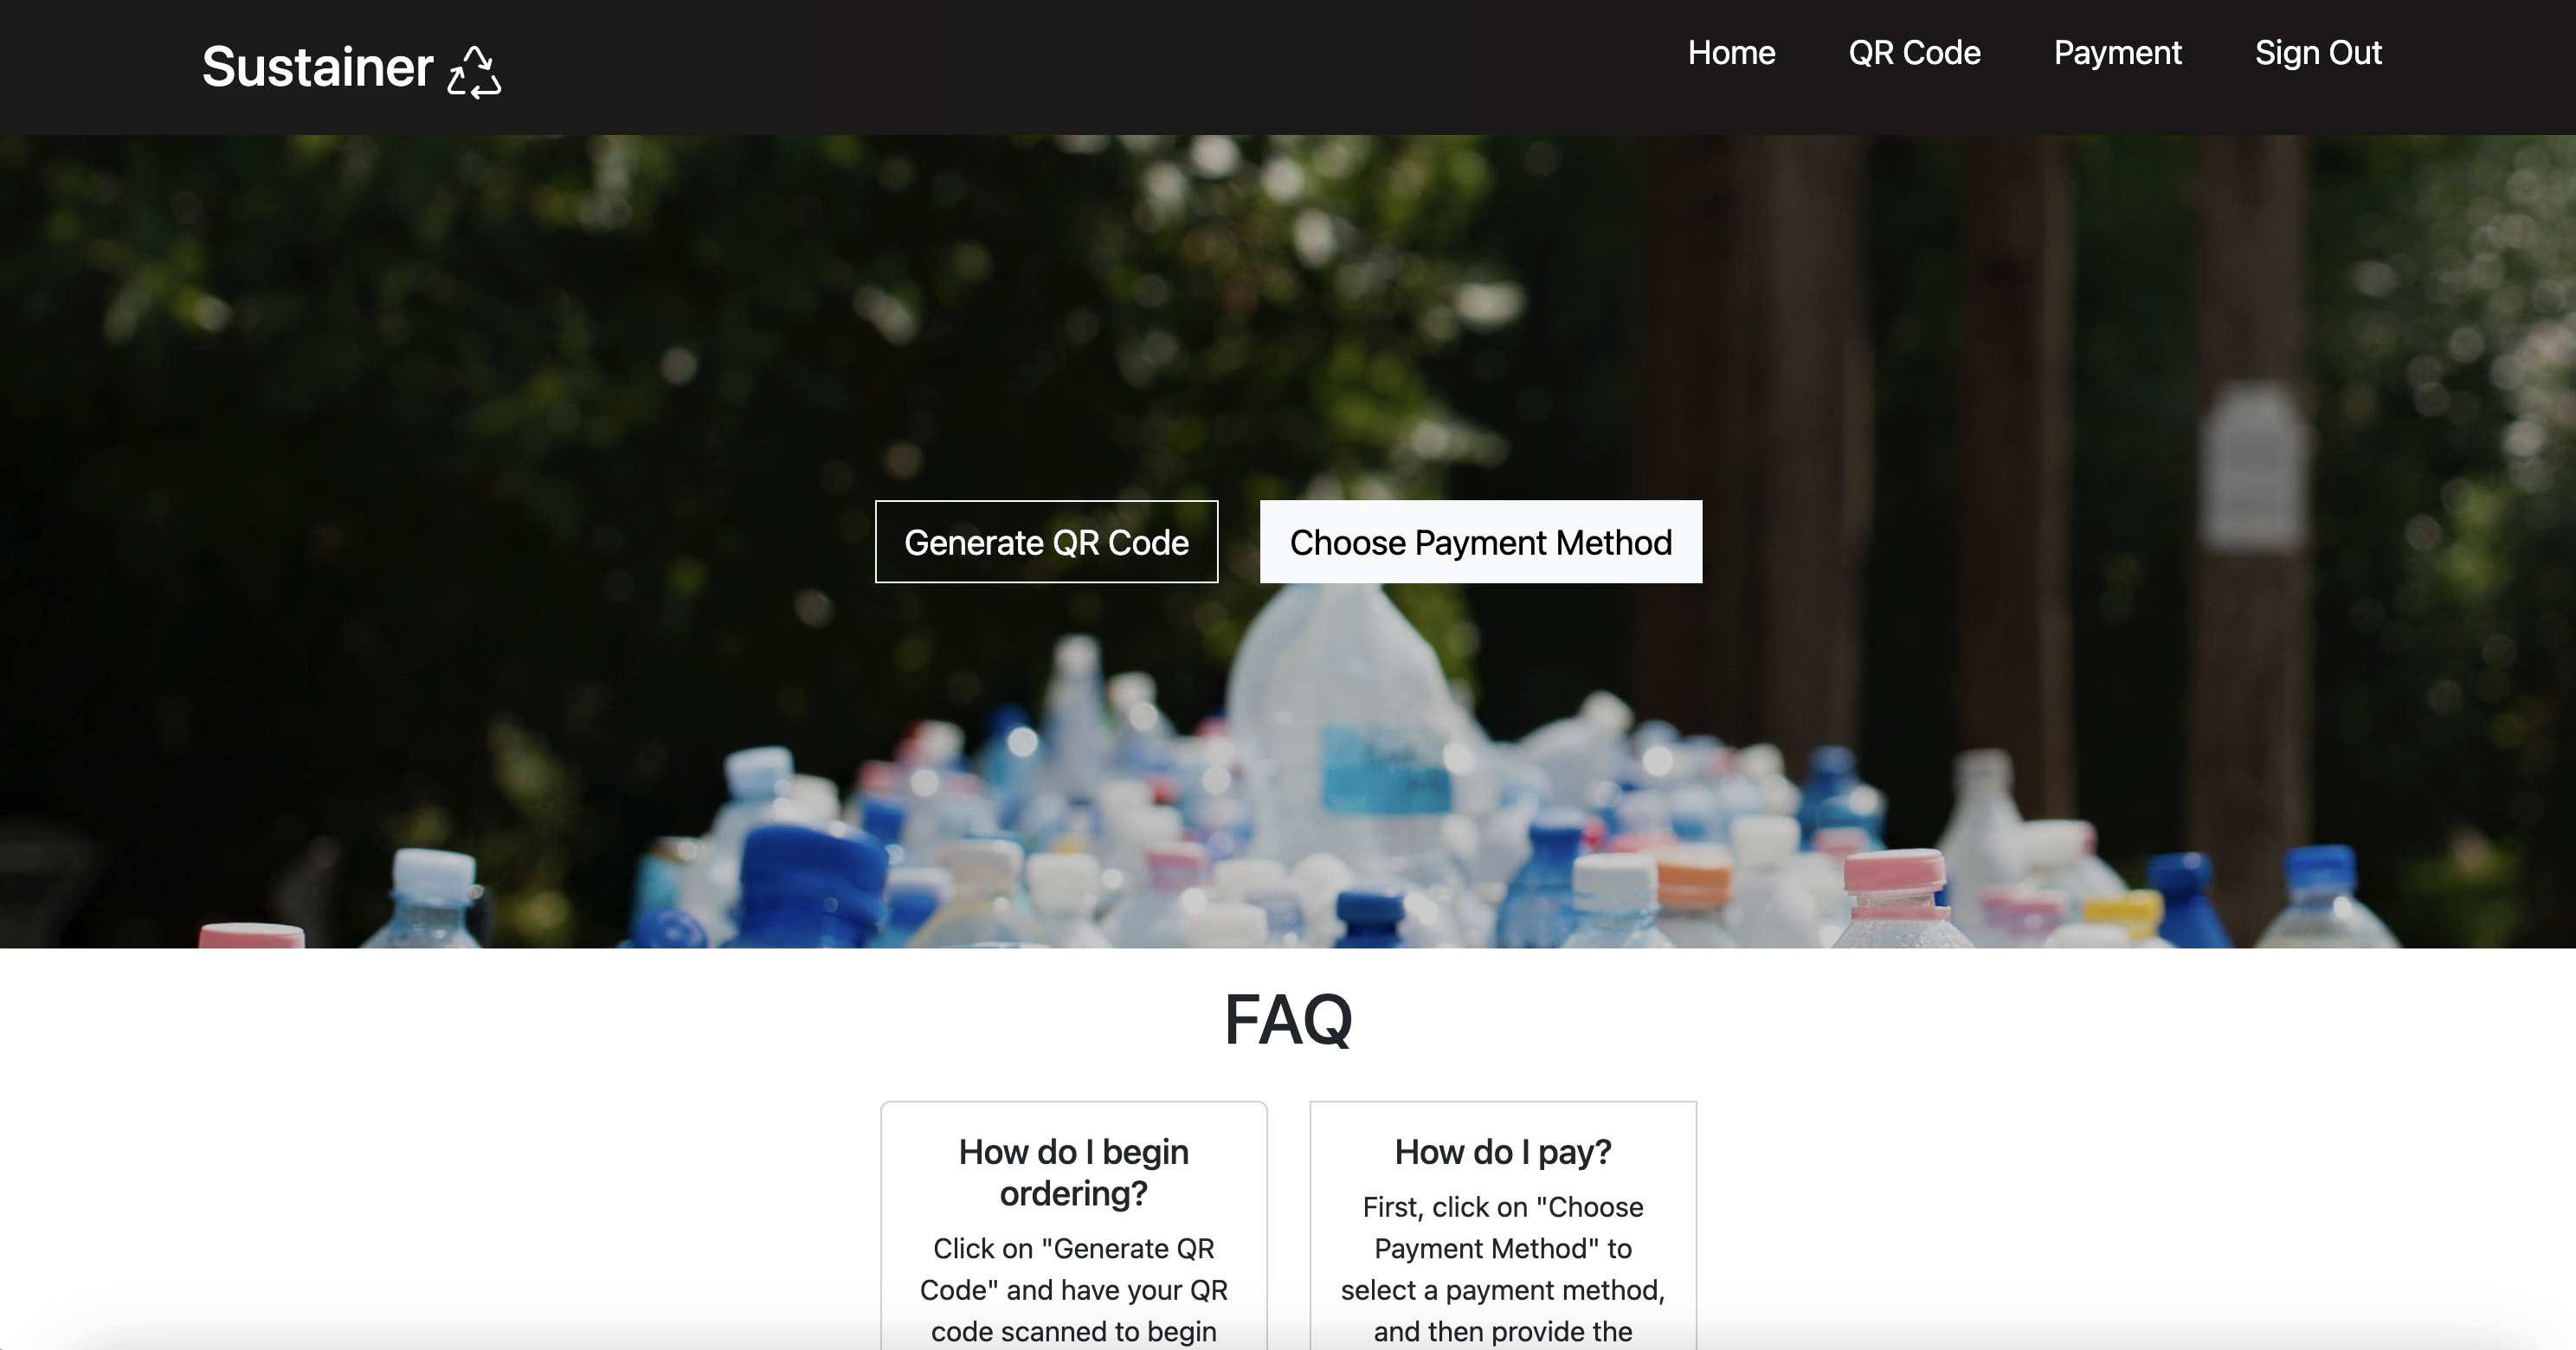
User Home Page
After logging in, you are taken to the home page, which presents generic information on how to use the app. On this page, there are options to link your credit card information and get your QR code.
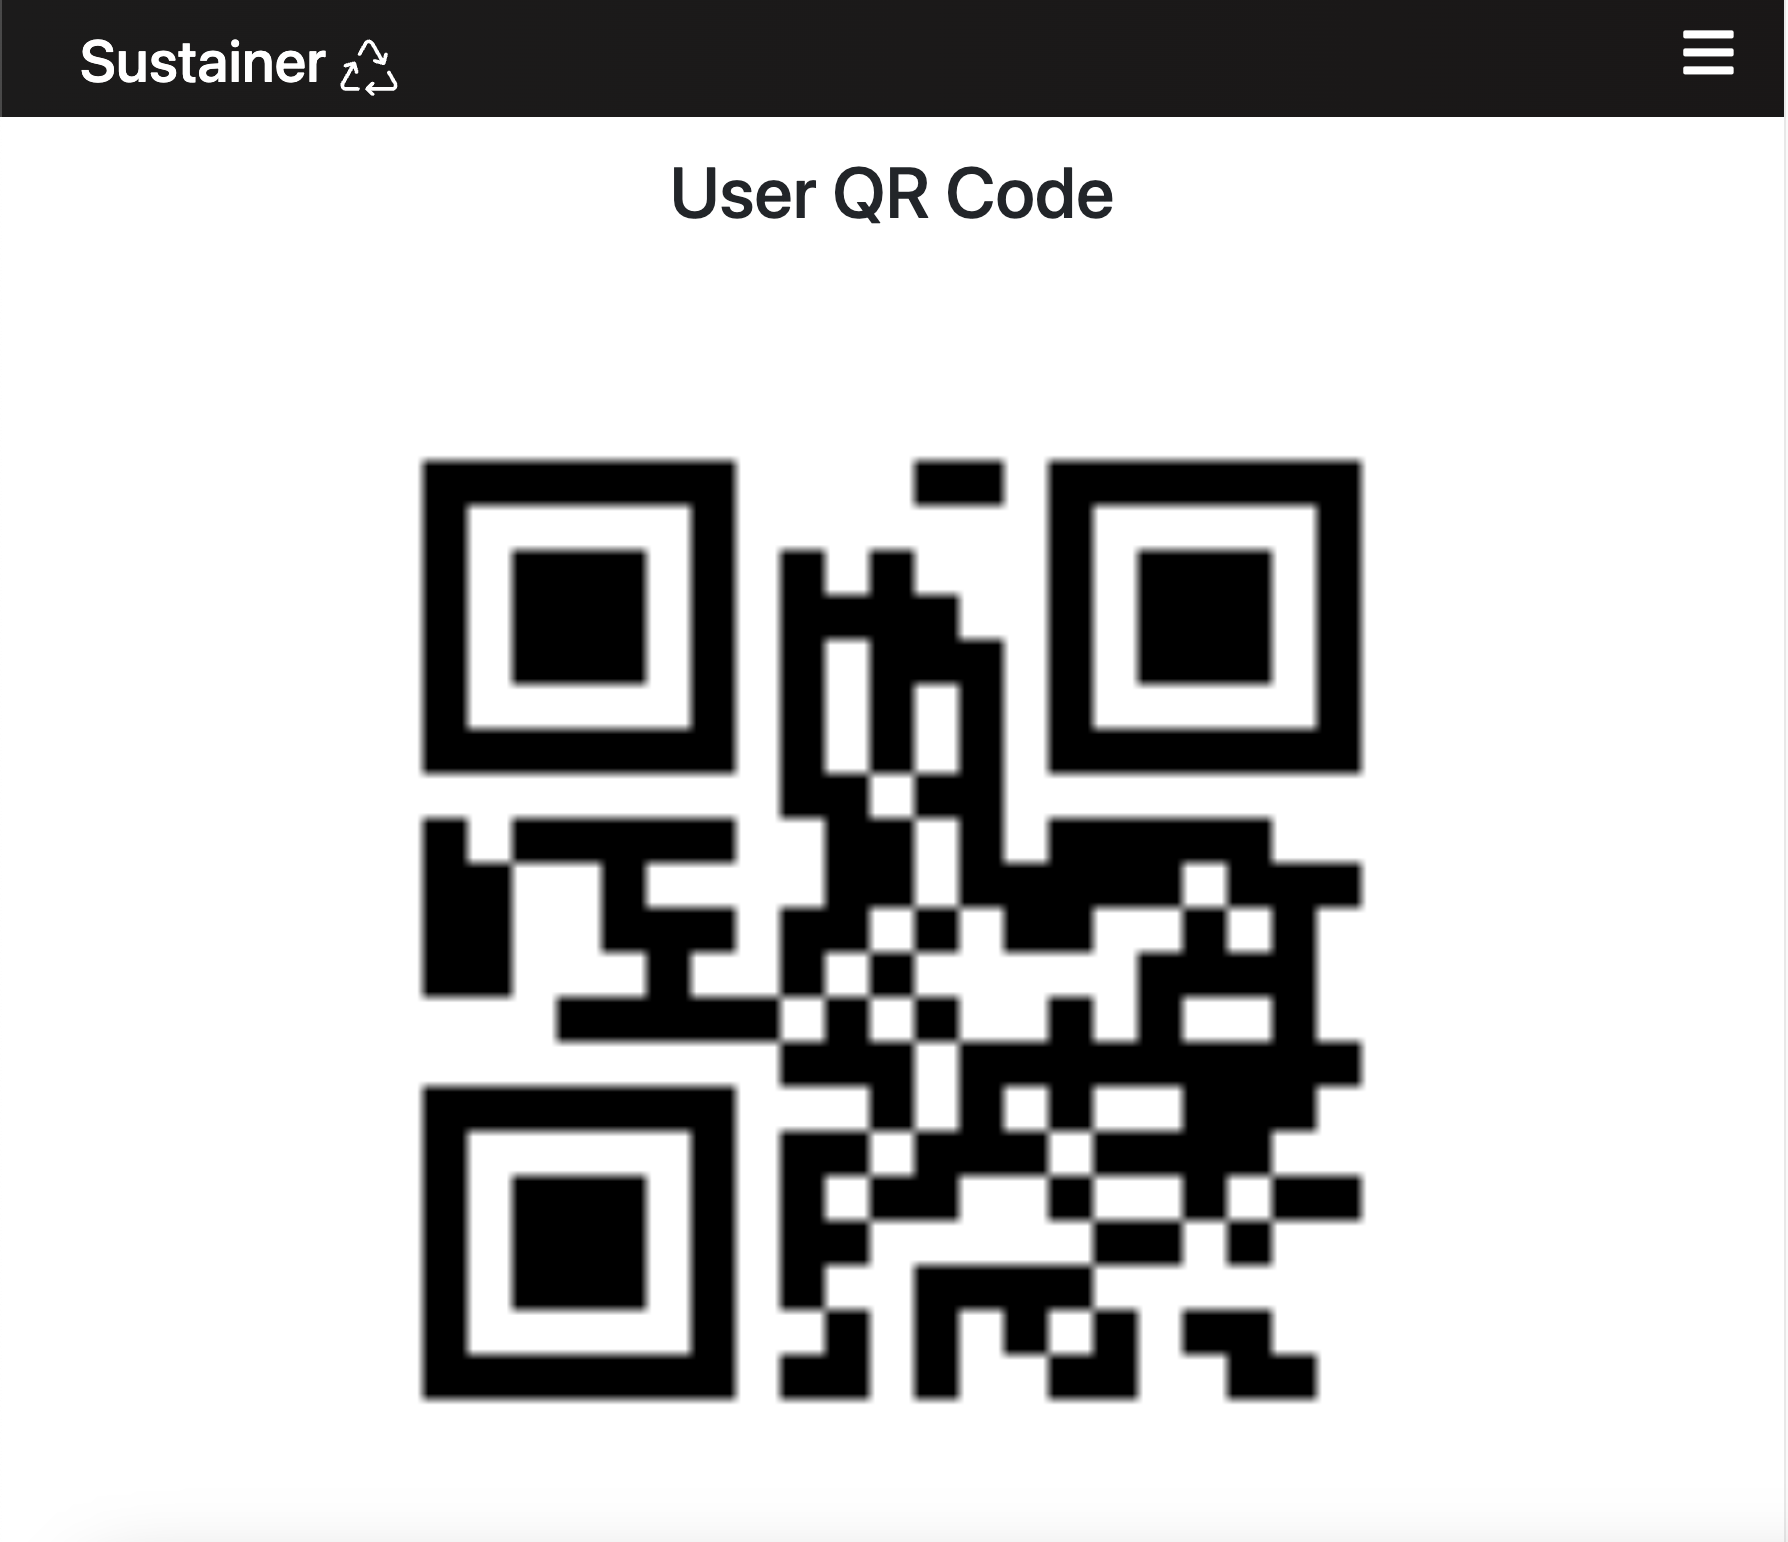
QR Code Generator
Clicking on “Generate QR Code” will display the user’s personal QR code. This will be used when the user orders food at the event. Customers will scan the QR at a food truck or vendor, which will “assign” those containers to them during the event. This helps admin keep track of the containers.
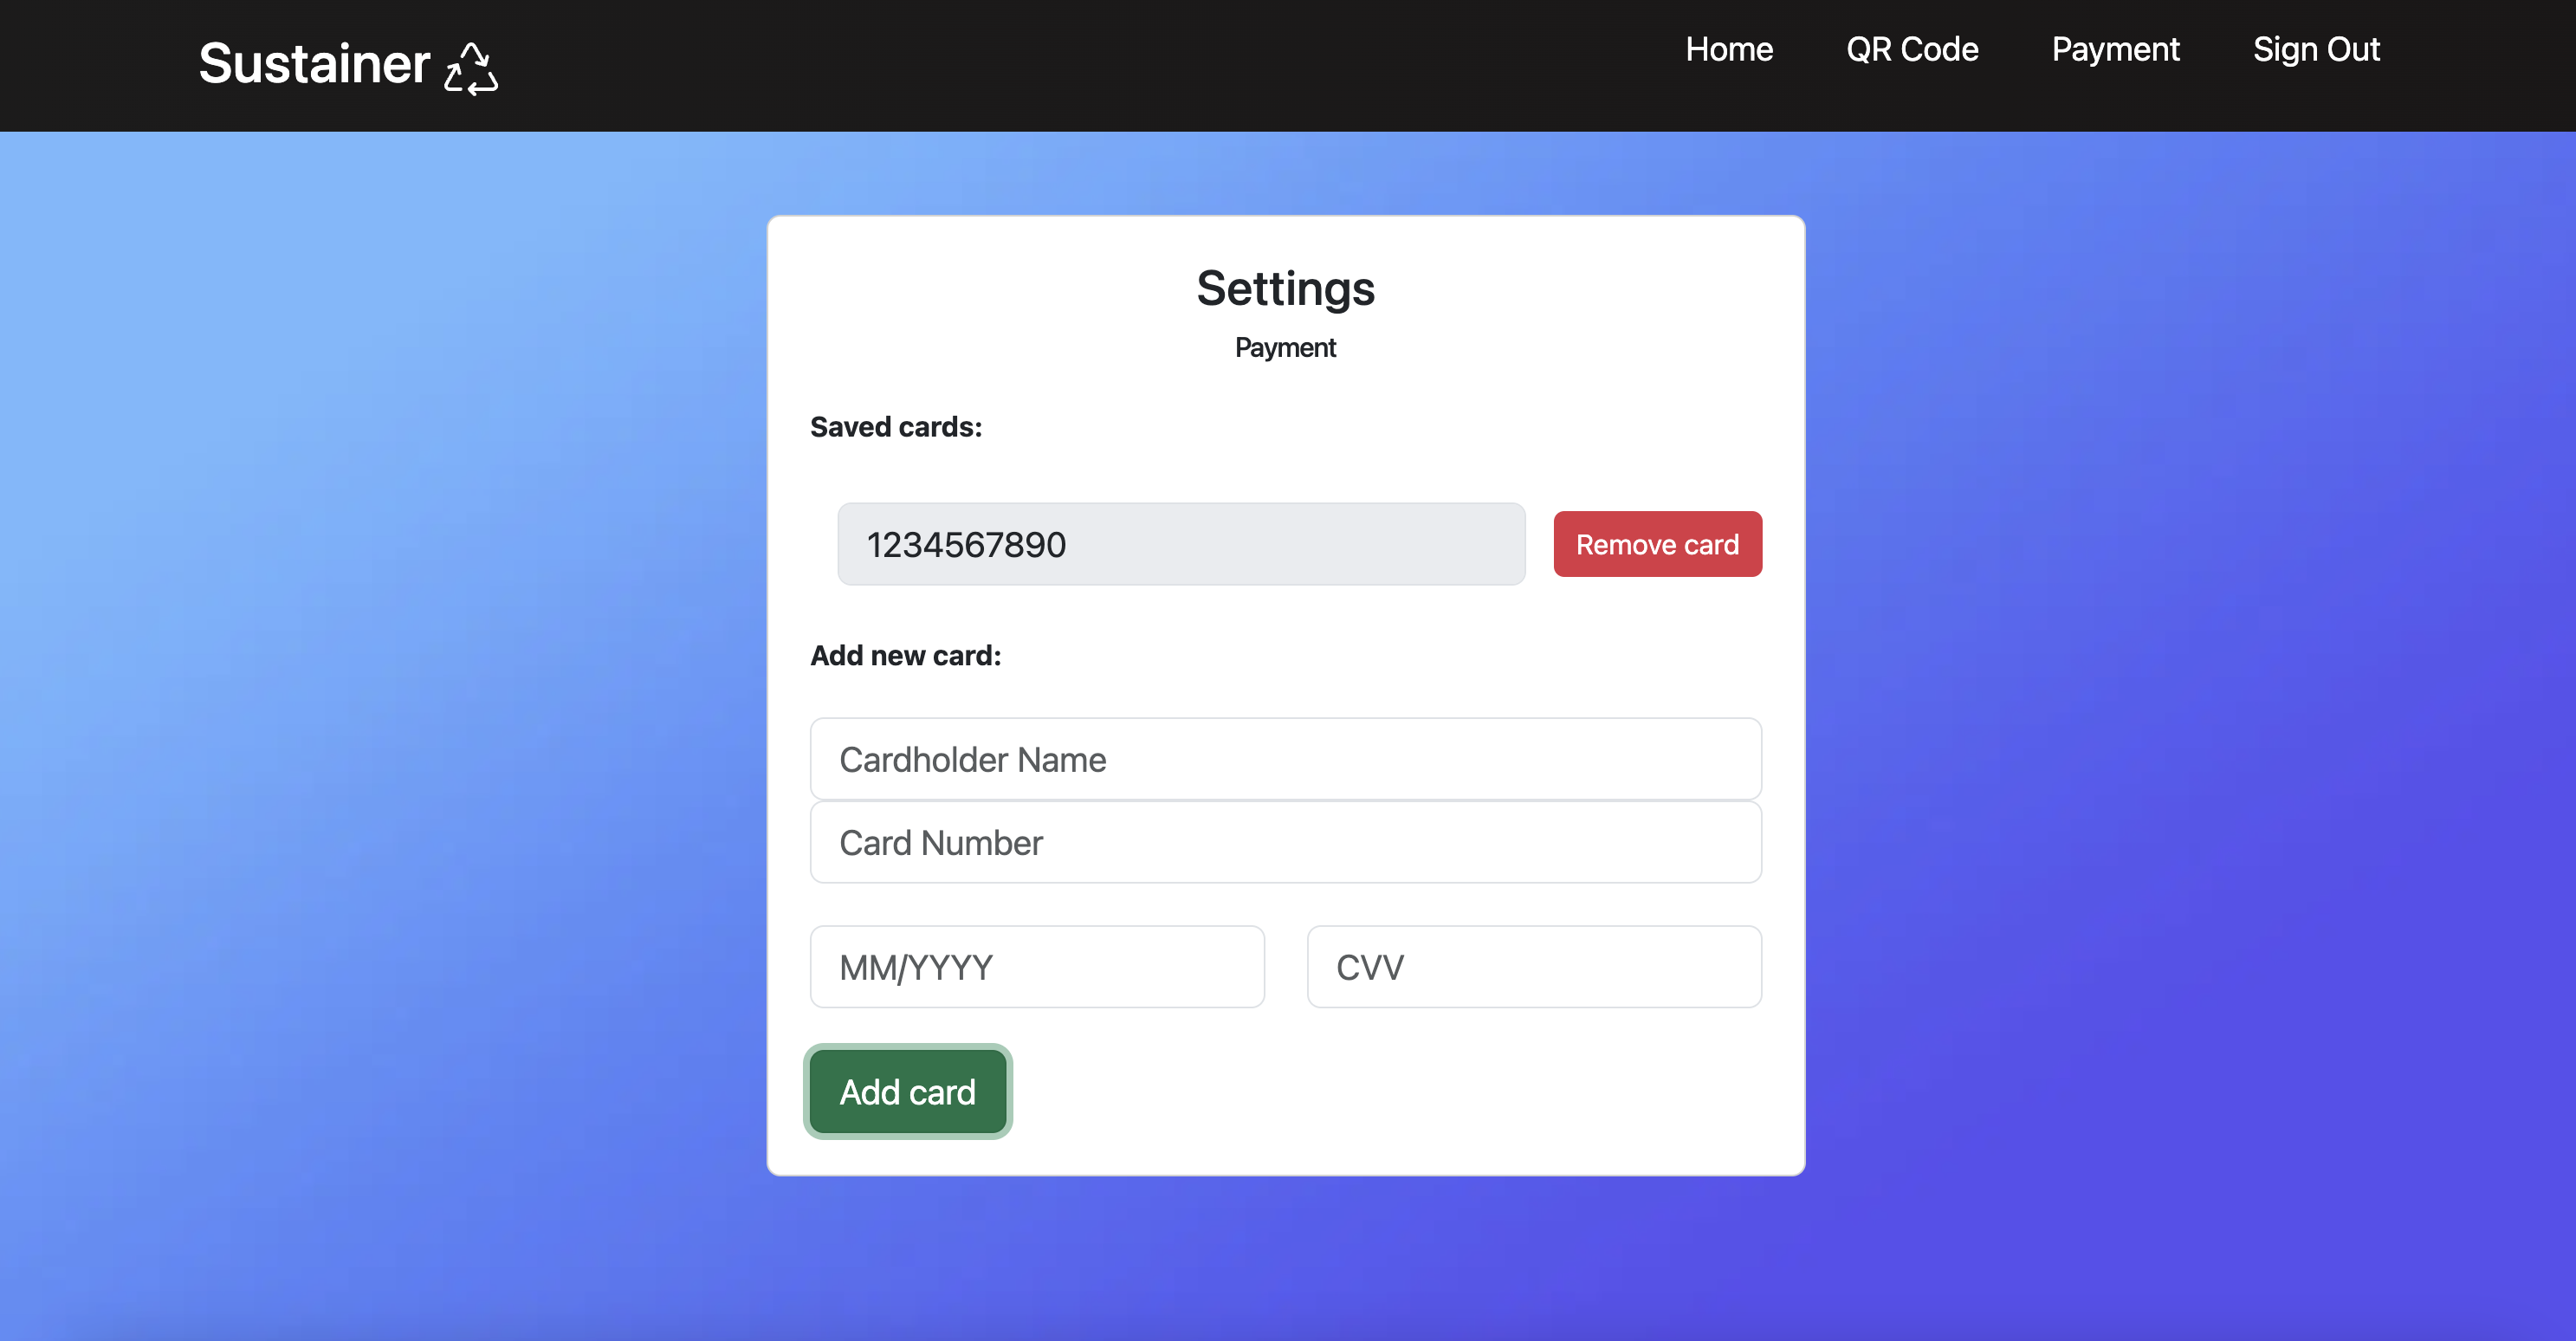
Payment Portal
Clicking on “Choose Payment Method” will direct you to form where you can link and input your credit card information. Credit card information is used as collateral for any containers that are ordered and not returned within a specific limit or duration of the ongoing event. Upon ordering containers, there will be a pending charge based on the number of containers ordered, with each container charged at a flat rate. Payment will not be processed on your account if containers are returned before the end of the event.
Vendor Home Page
After logging in as a vendor, there are options to scan a container to assign to a user, order containers for an event, view your order history, and view an inventory of the remaining containers that a vendor has. This is shown on the main page and in the nav bar.

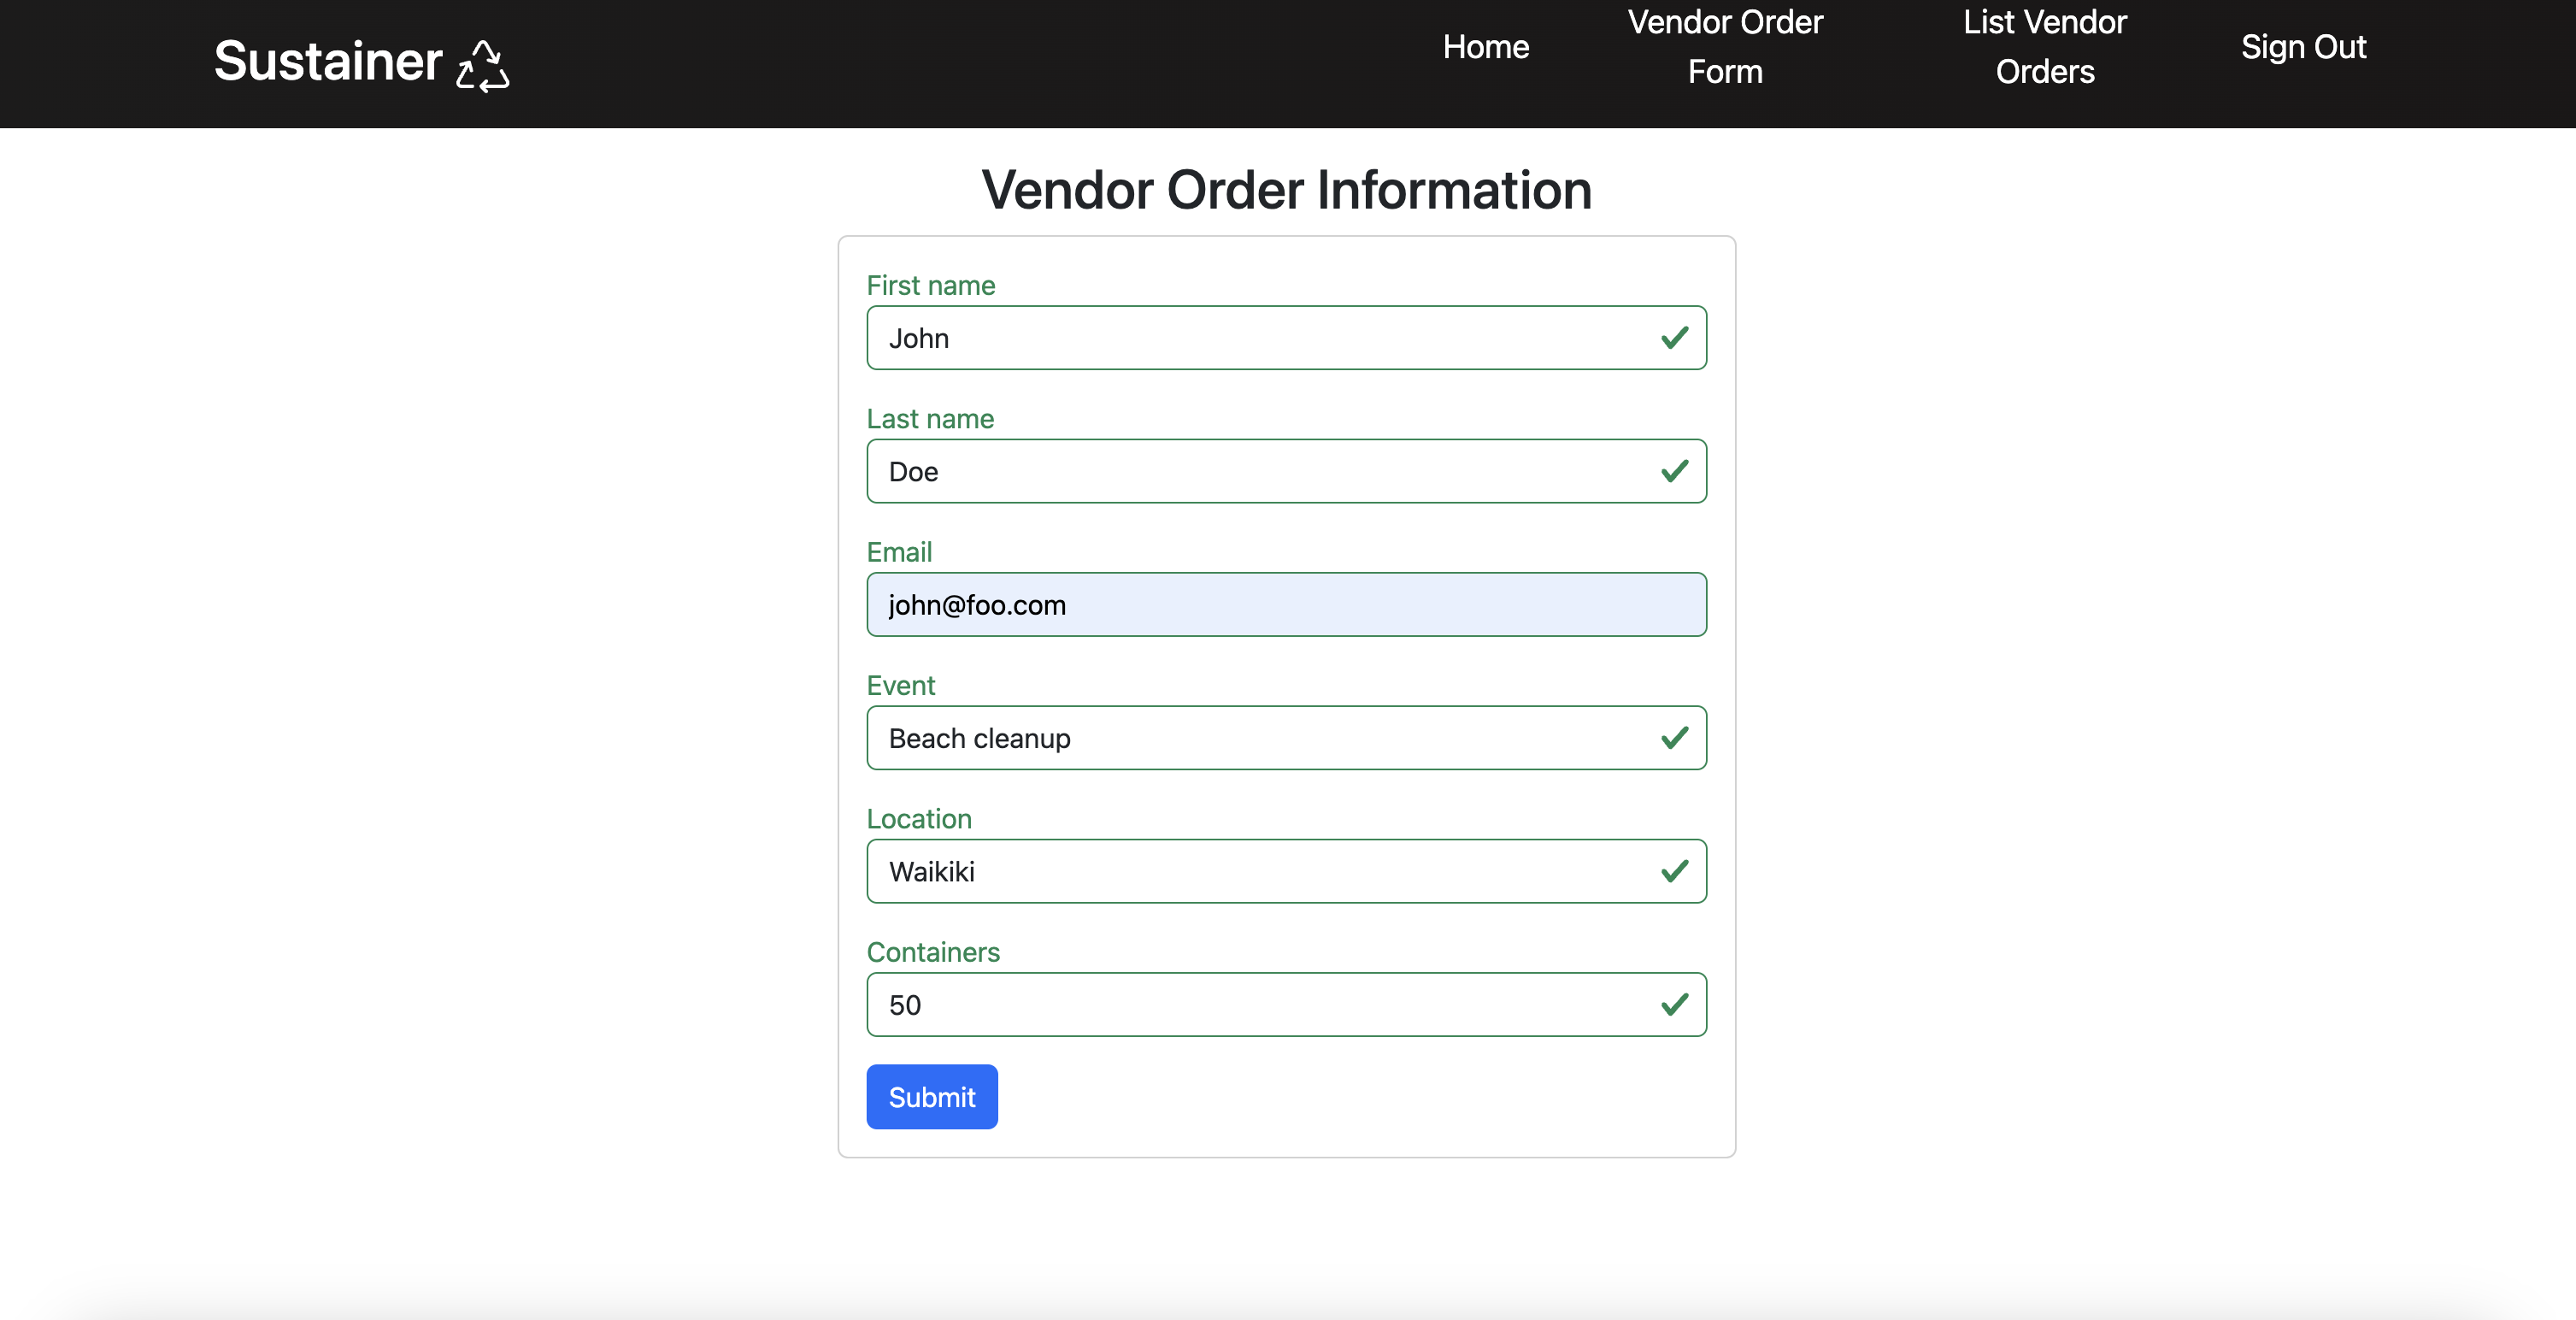
Vendor Order Form
Upon log in as a vendor, a form is displayed to allow vendors to order a certain number of containers for an event. This allows the Full Cycle Takeout program to accurately distribute the right number of containers to each vendor before a customer uses them when ordering take-out at the event.
Vendor Order History Page
Clicking on the “History” nav link will show a history list of order forms that a vendor has filled out for all previous and upcoming events. Vendors will be able to edit current pending forms for an event that hasn’t passed. They can also delete forms from their history. An approval status for each order will show if an admin has either approved or rejected their order request of containers. The vendor can also tell if an approval is still pending.

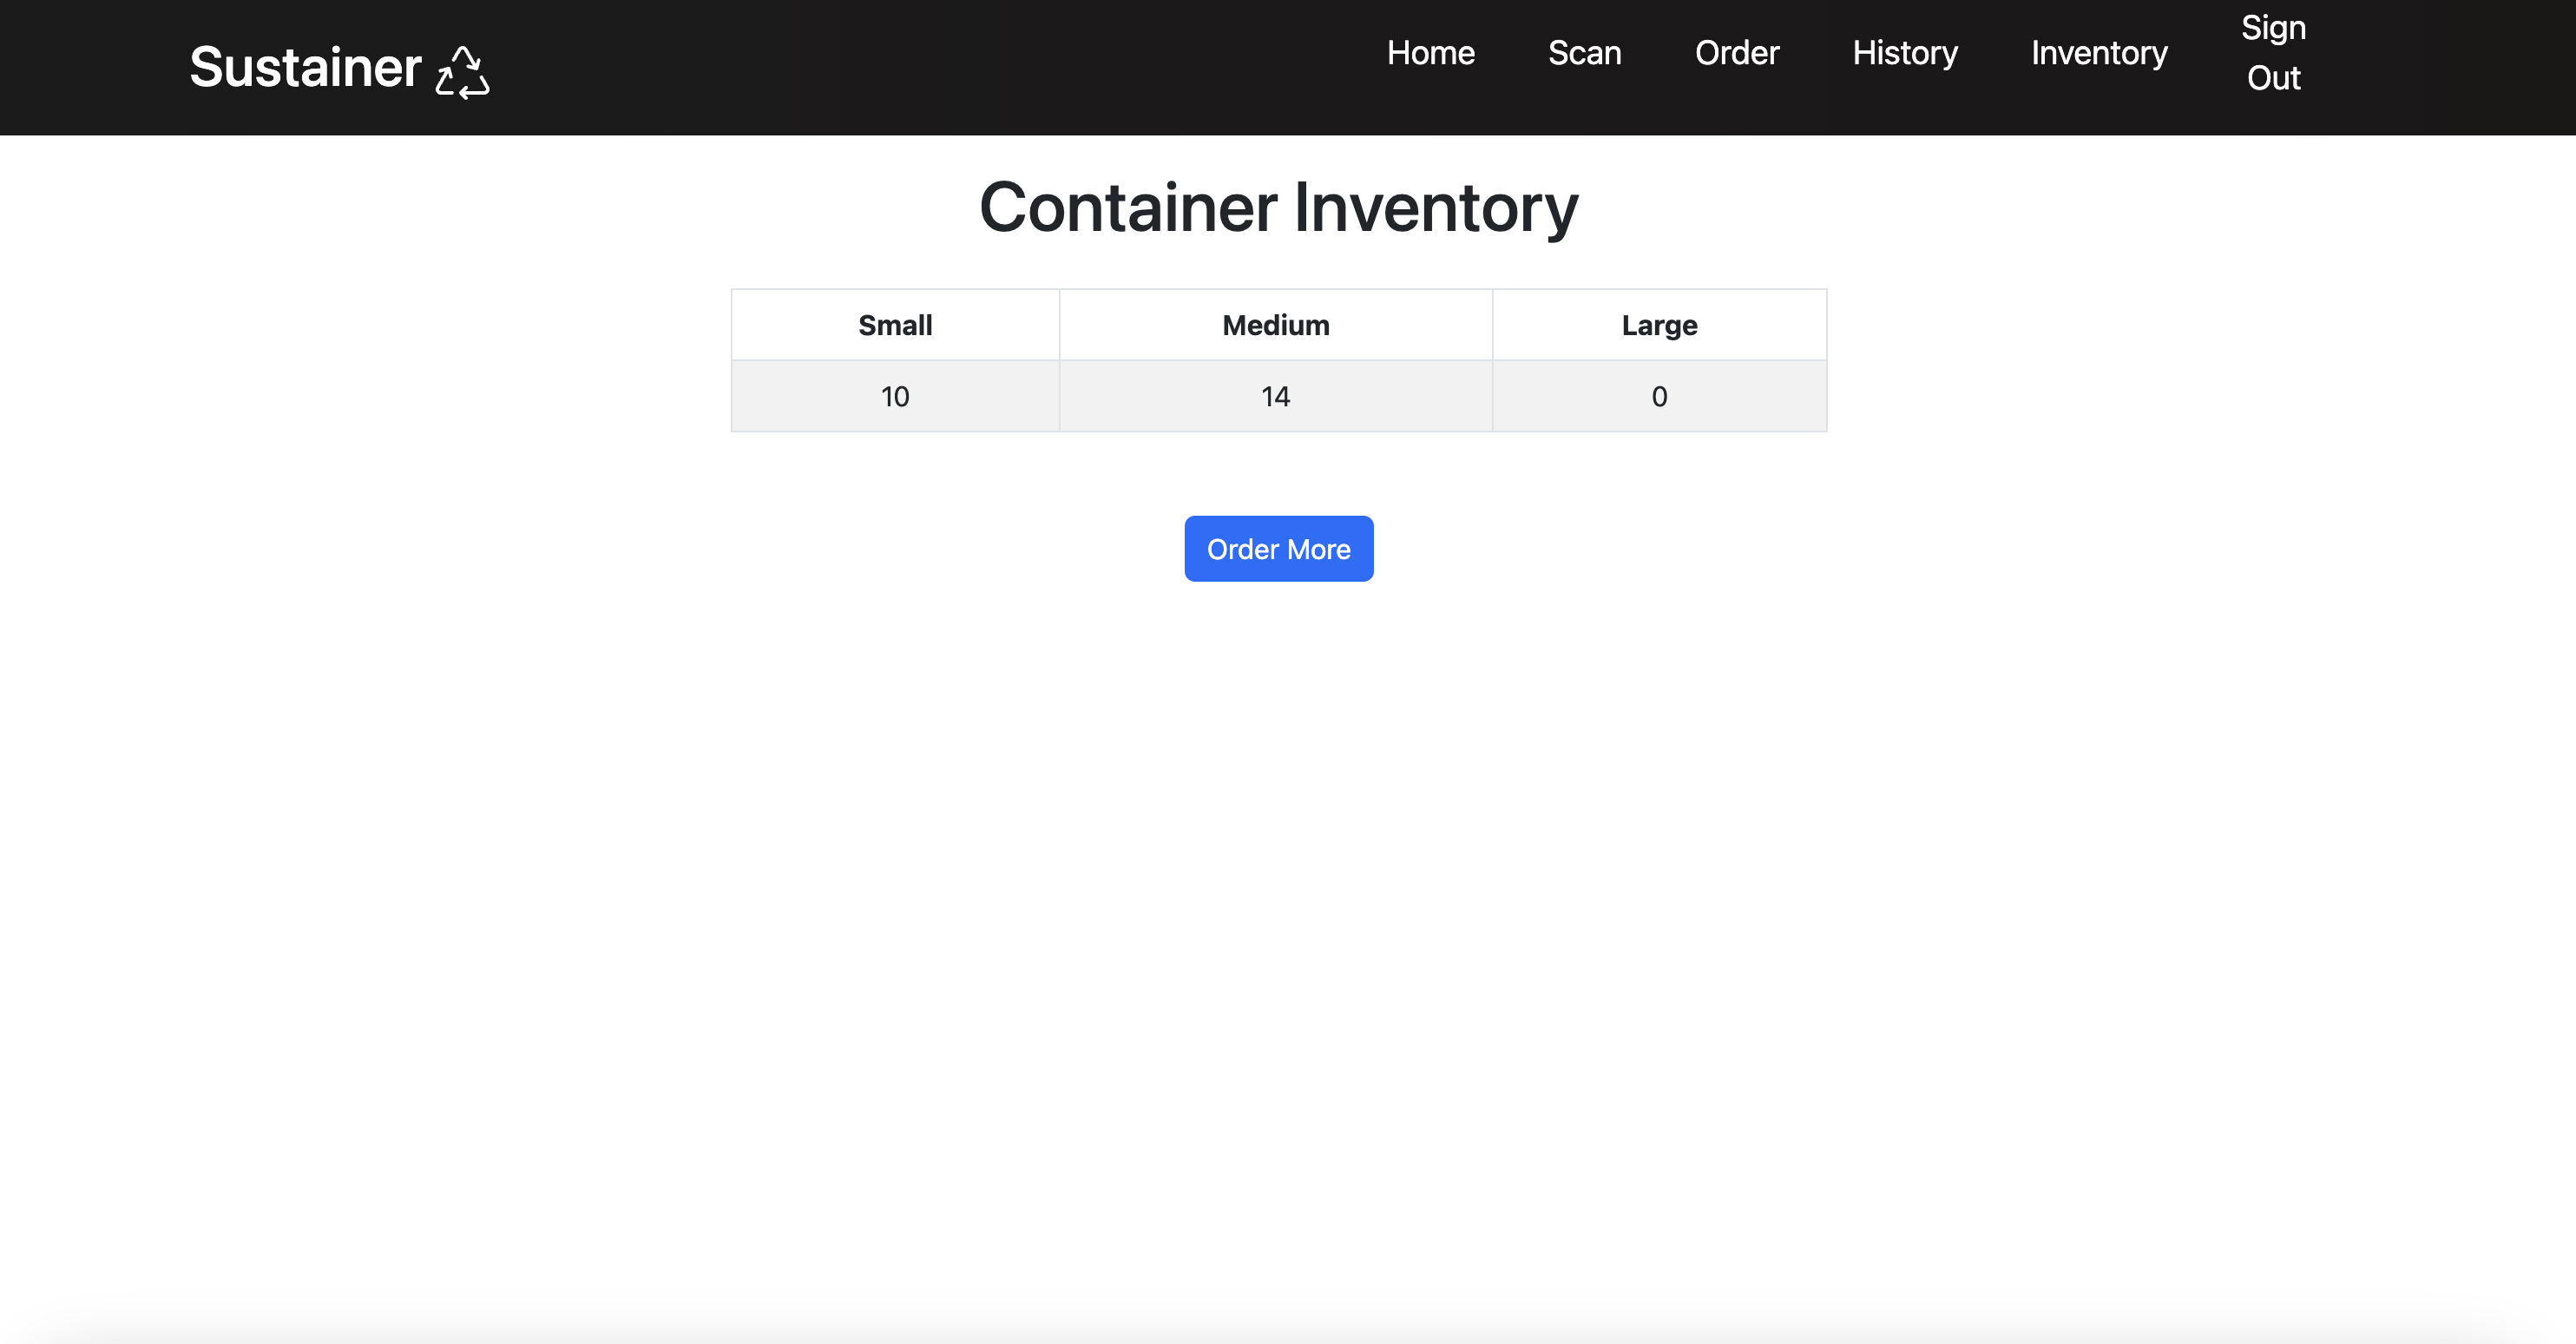
Vendor Inventory Page
Clicking on the “Inventory” nav link will show the remaining containers that a vendor has left in stock. Vendors can add more containers by clicking on the “Order More” button, which will direct them to an order form page.
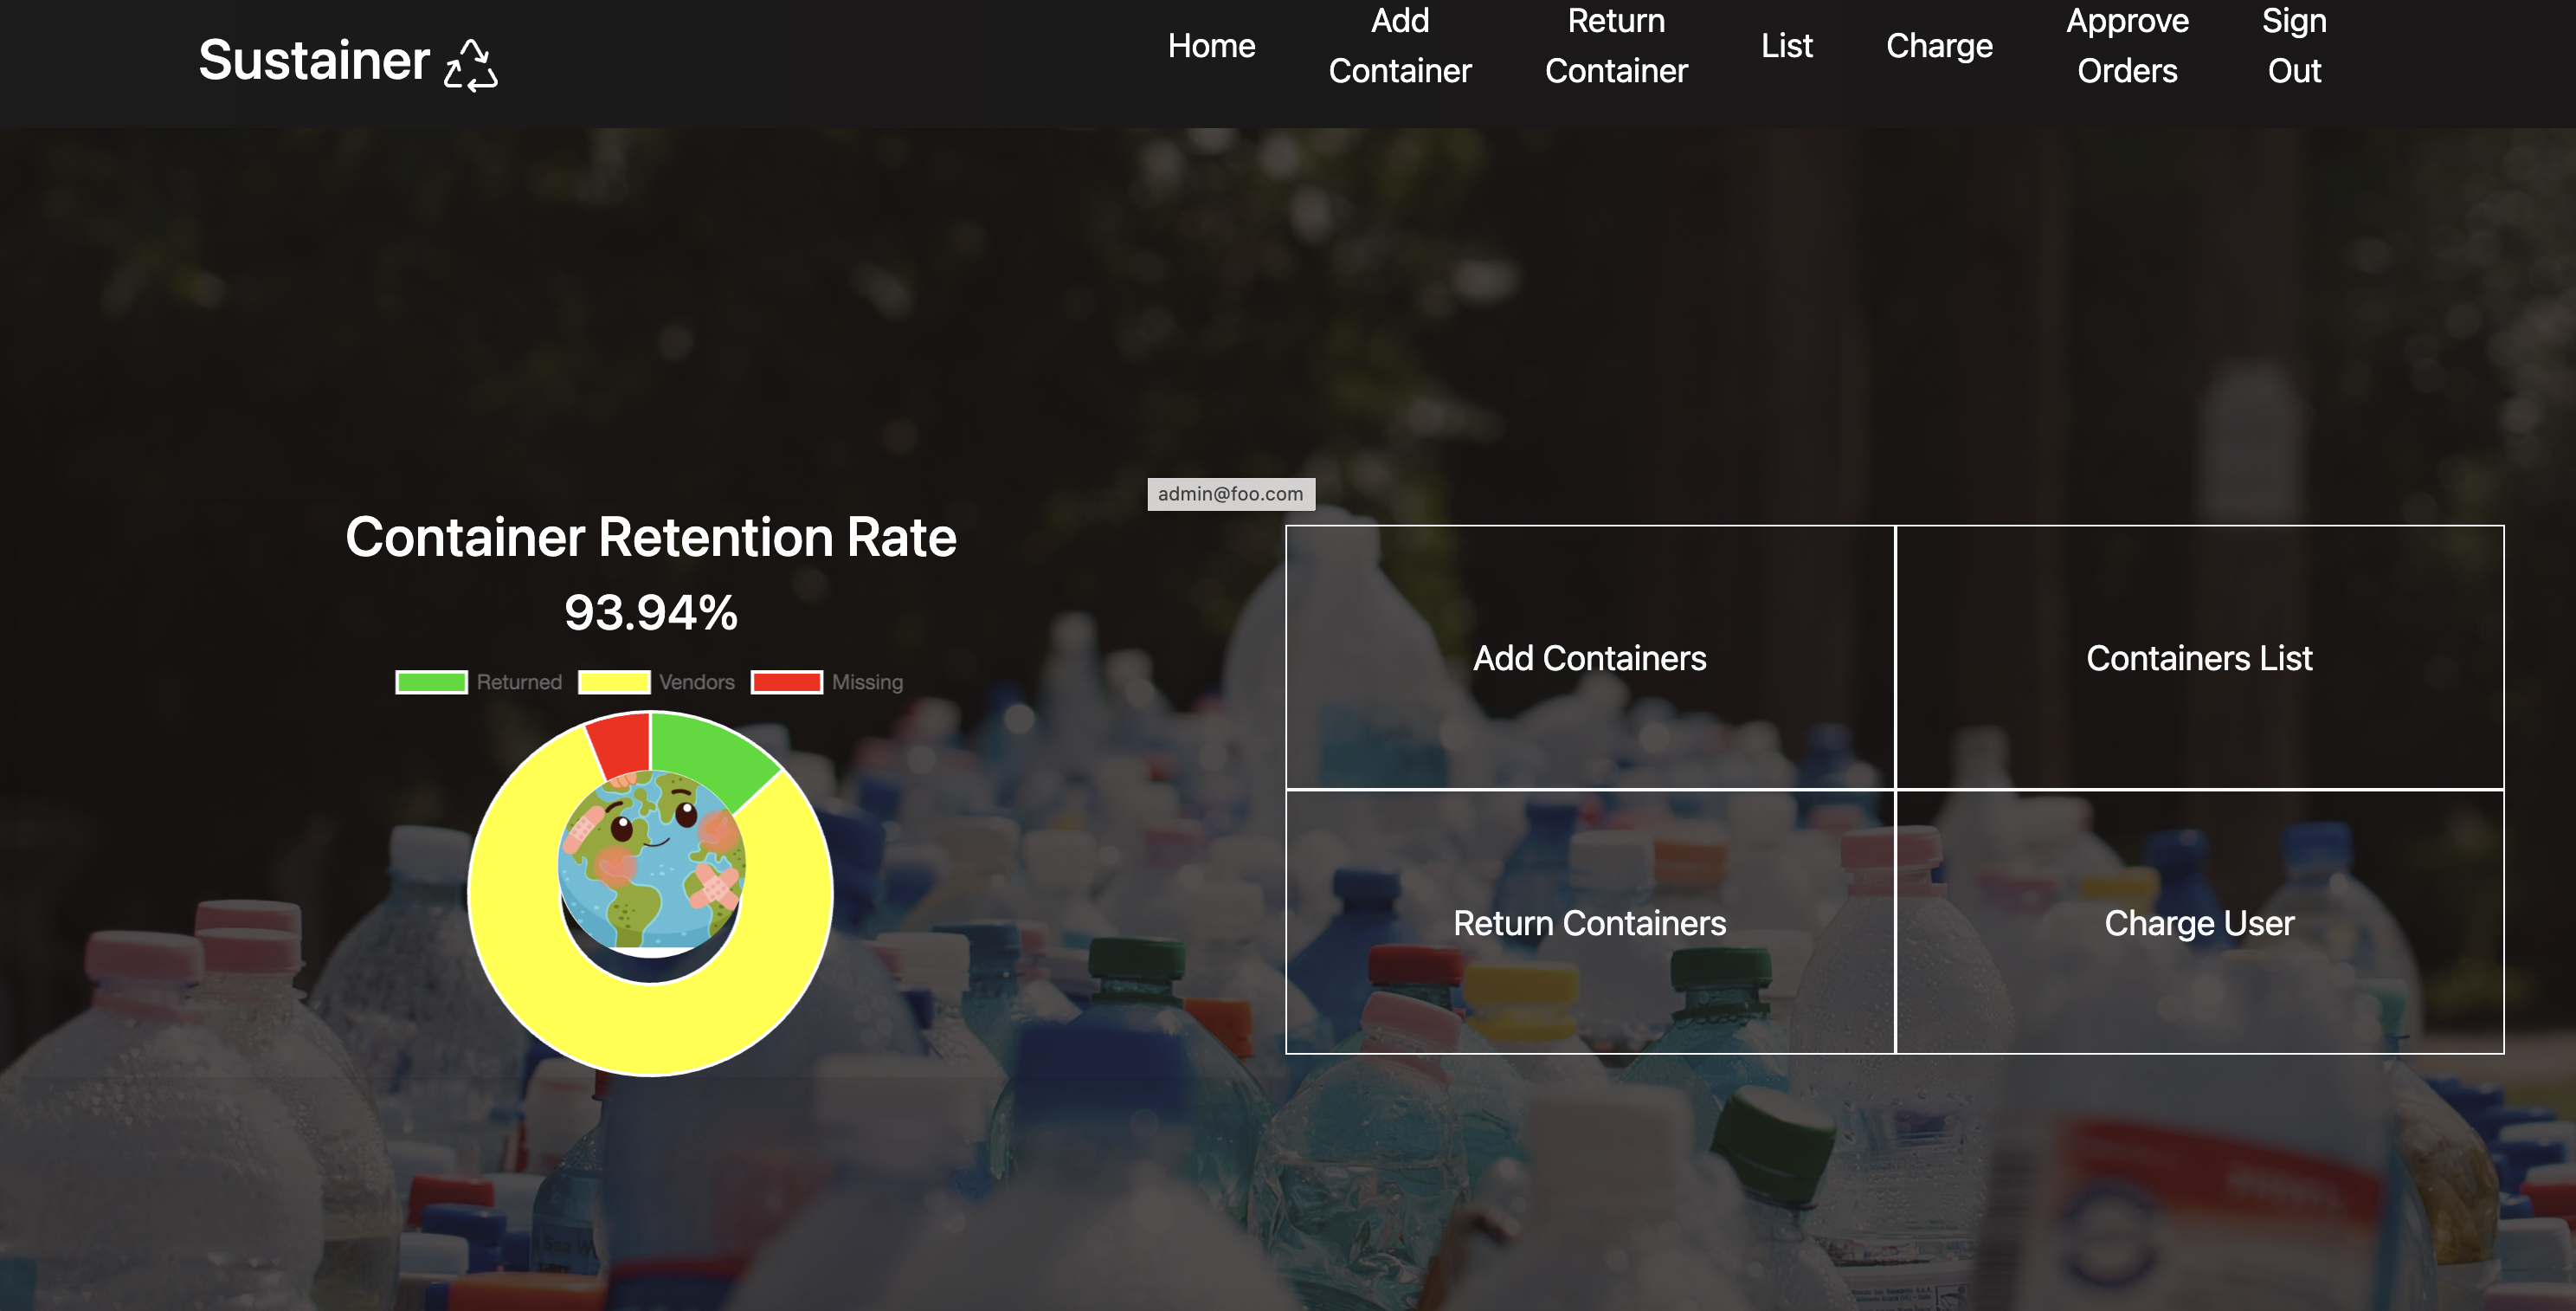
Admin Home Page
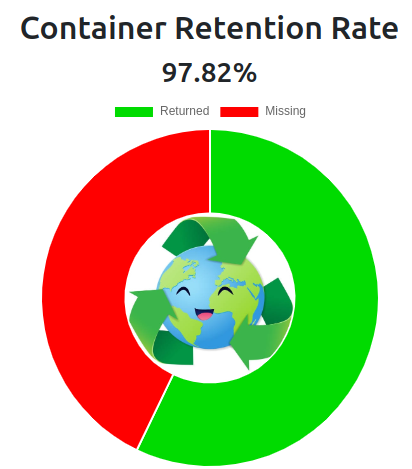
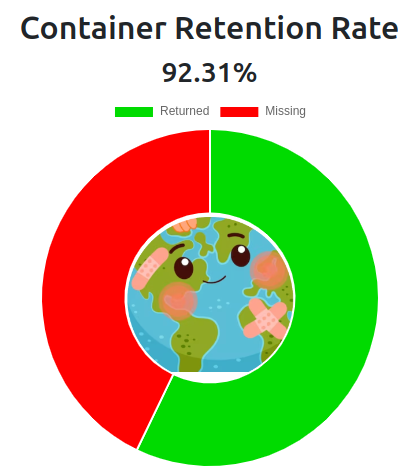
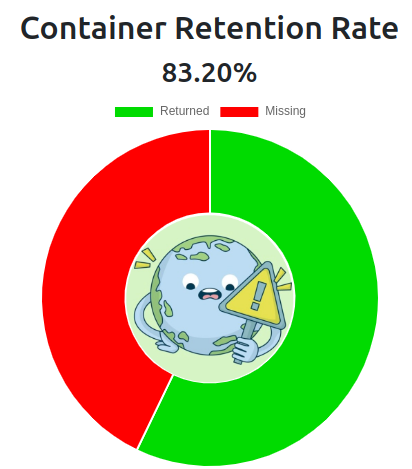
After logging in as an admin, there are options to add new containers to the database, scan a returned container, list all the containers at an event, charge a user accordingly, and approve any pending vendor orders. This is shown on the main page and in the nav bar. There is also a graphic displaying the current container retention rate to keep track of the progress during the event.
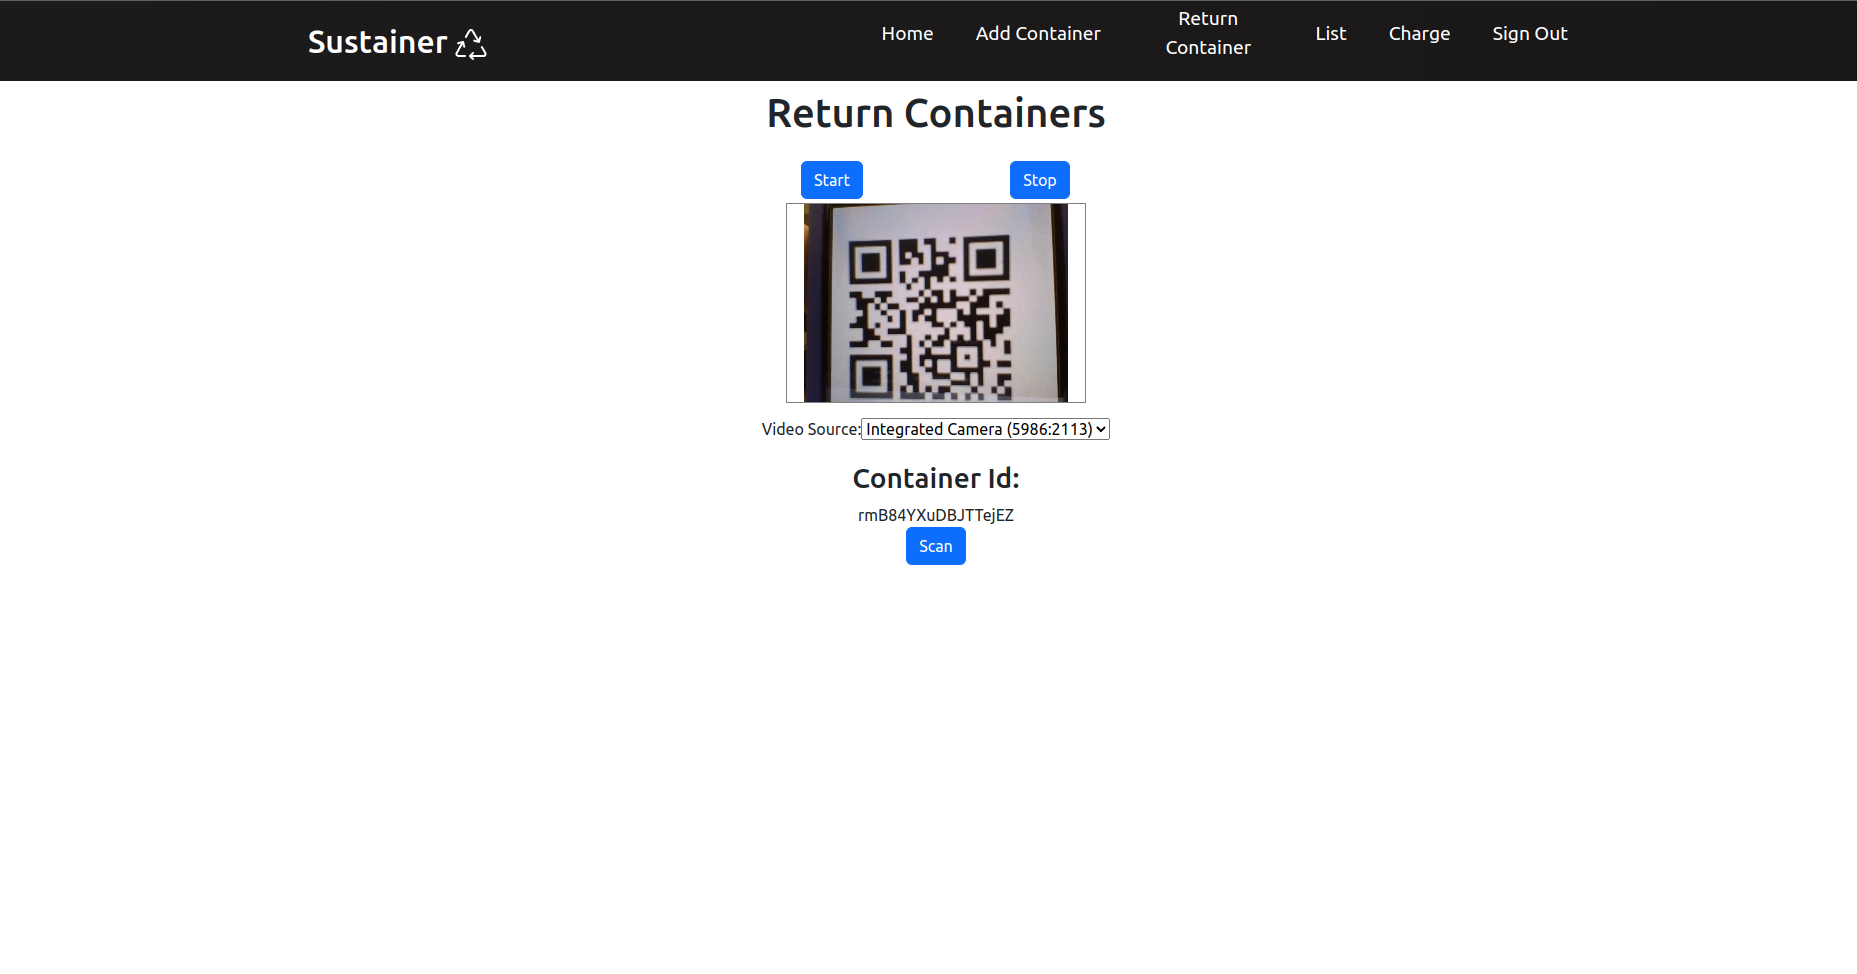
Scan QR Code Page
After an event is over, moderators (workers) and administrators of the organization can use this page to scan QR codes on the containers and check them back in. This confirms that the user/consumer has returned all of their “assigned” containers from the event. Proper authorized accounts can only access this page by clicking on the “Scan Containers” nav link upon signing in.
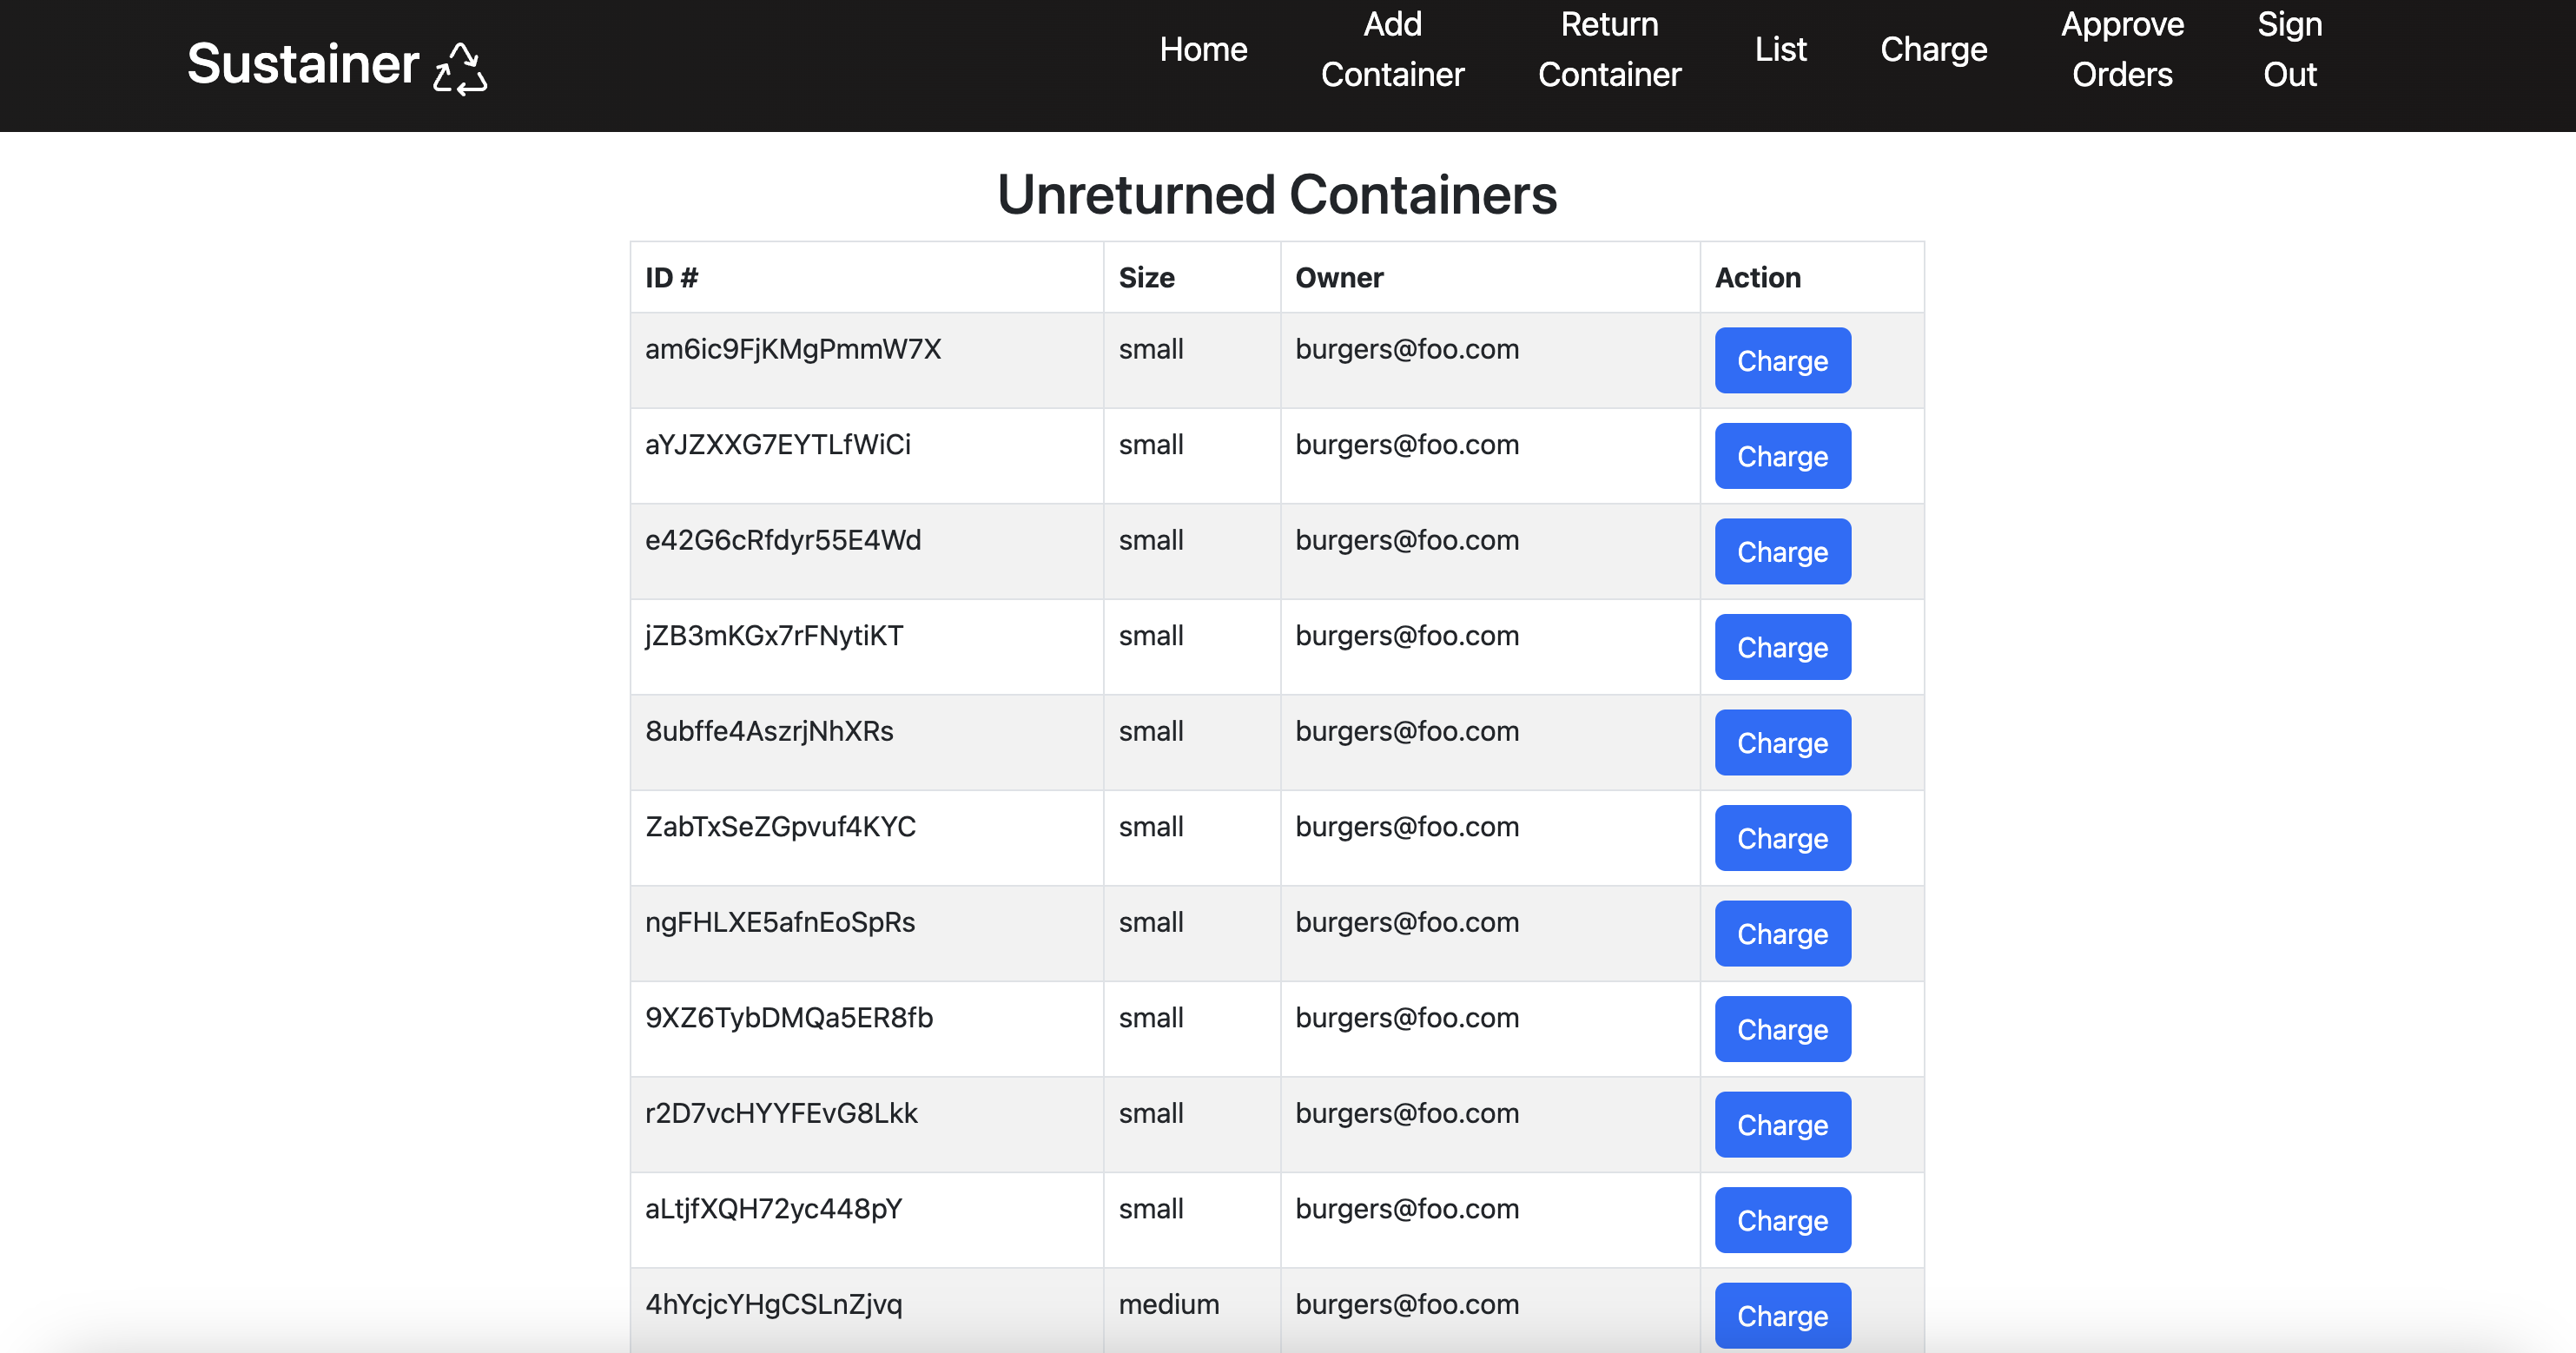
Admin Stats Page
Admins and moderators can view all containers during an event to accurately track them. This will display all the available containers, as well as the owner that is assigned or responsible for a specific container. The database table UI will also have a search and filter function to find a certain container and check if a specific user has returned their containers respectively.
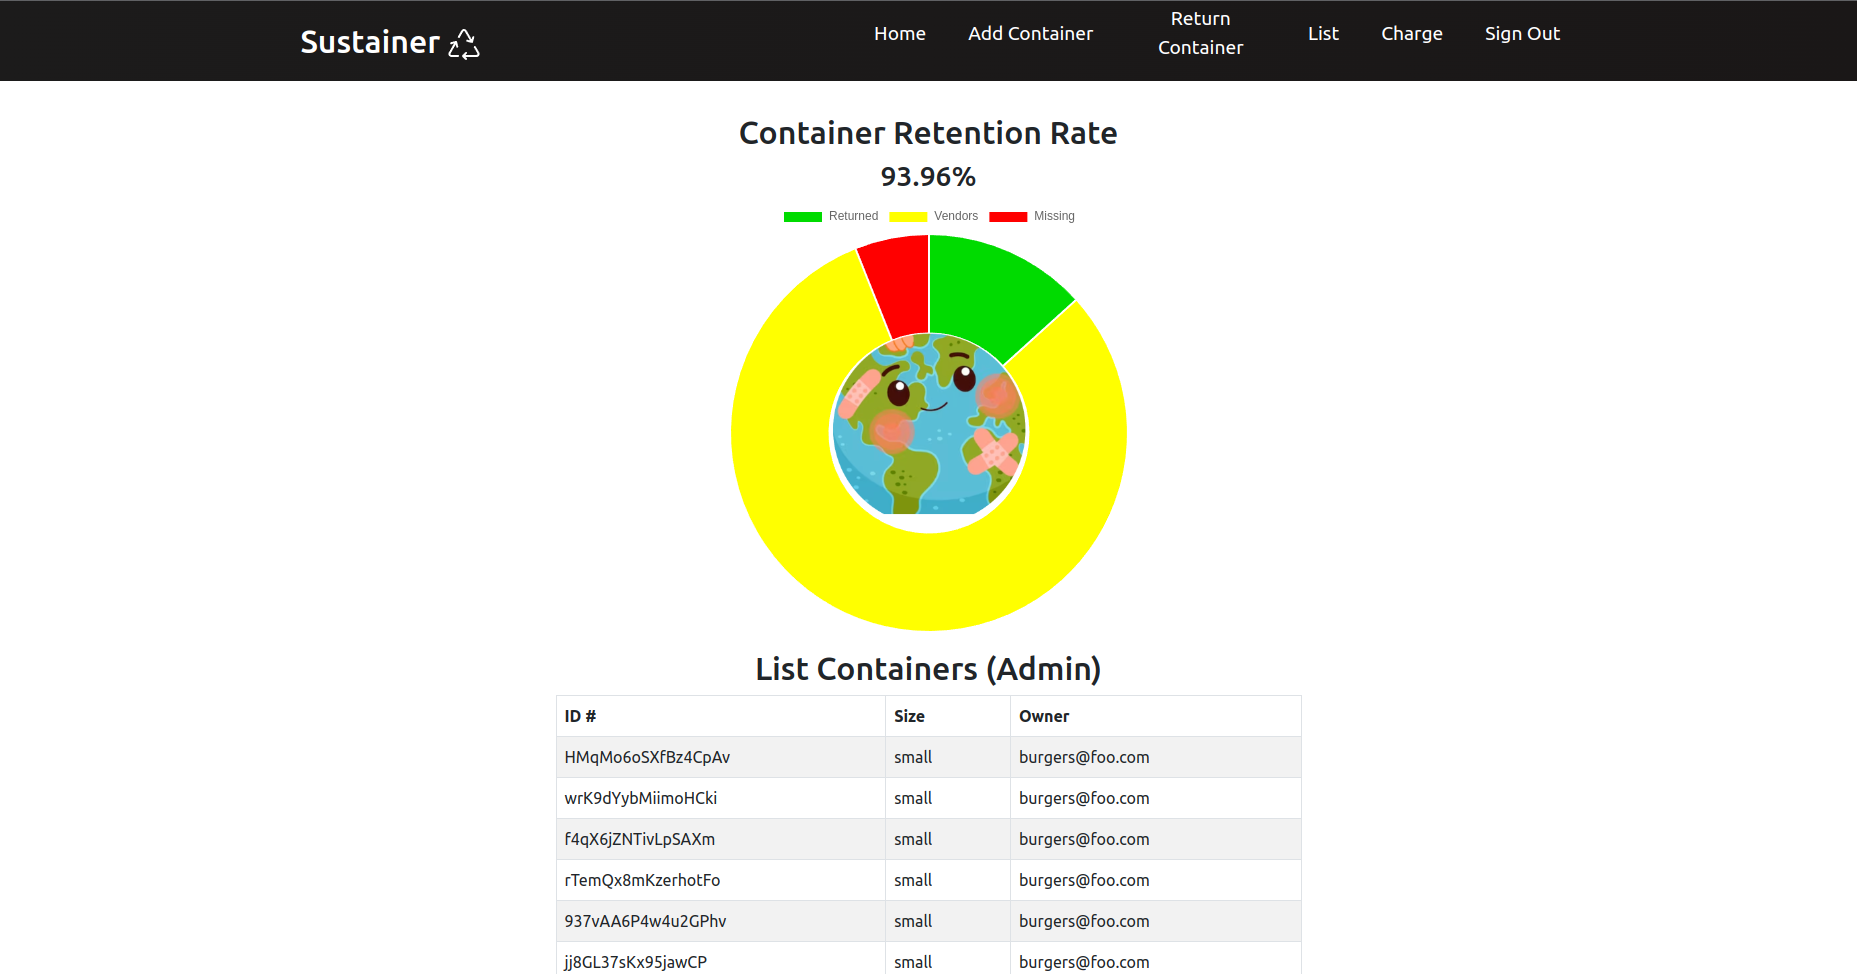
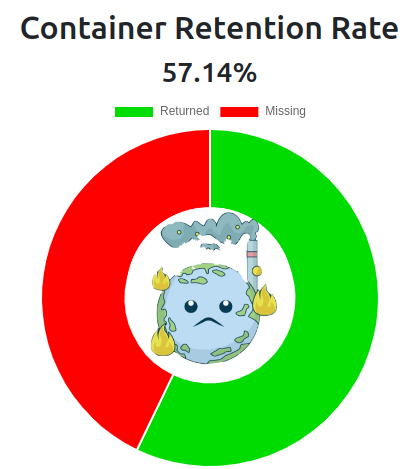
There is also a percentage graphic to show the retention rate of the containers. The pie chart will update in real-time when containers are taken out and returned by customers at the event. An environmental graphic will also correspond with the percentage of the containers that are returned. This will indicate the effectiveness of the take-out and return procedure at events, while also evaluating the “efficiency” of this app’s functionality.
Admin Adding Containers
Admins and moderators can add containers to the database by clicking on the “Add Containers” nav link. This will display a form to select the container size to add to the database. This is useful when the organization needs to replace or add more containers to the database for an upcoming event.
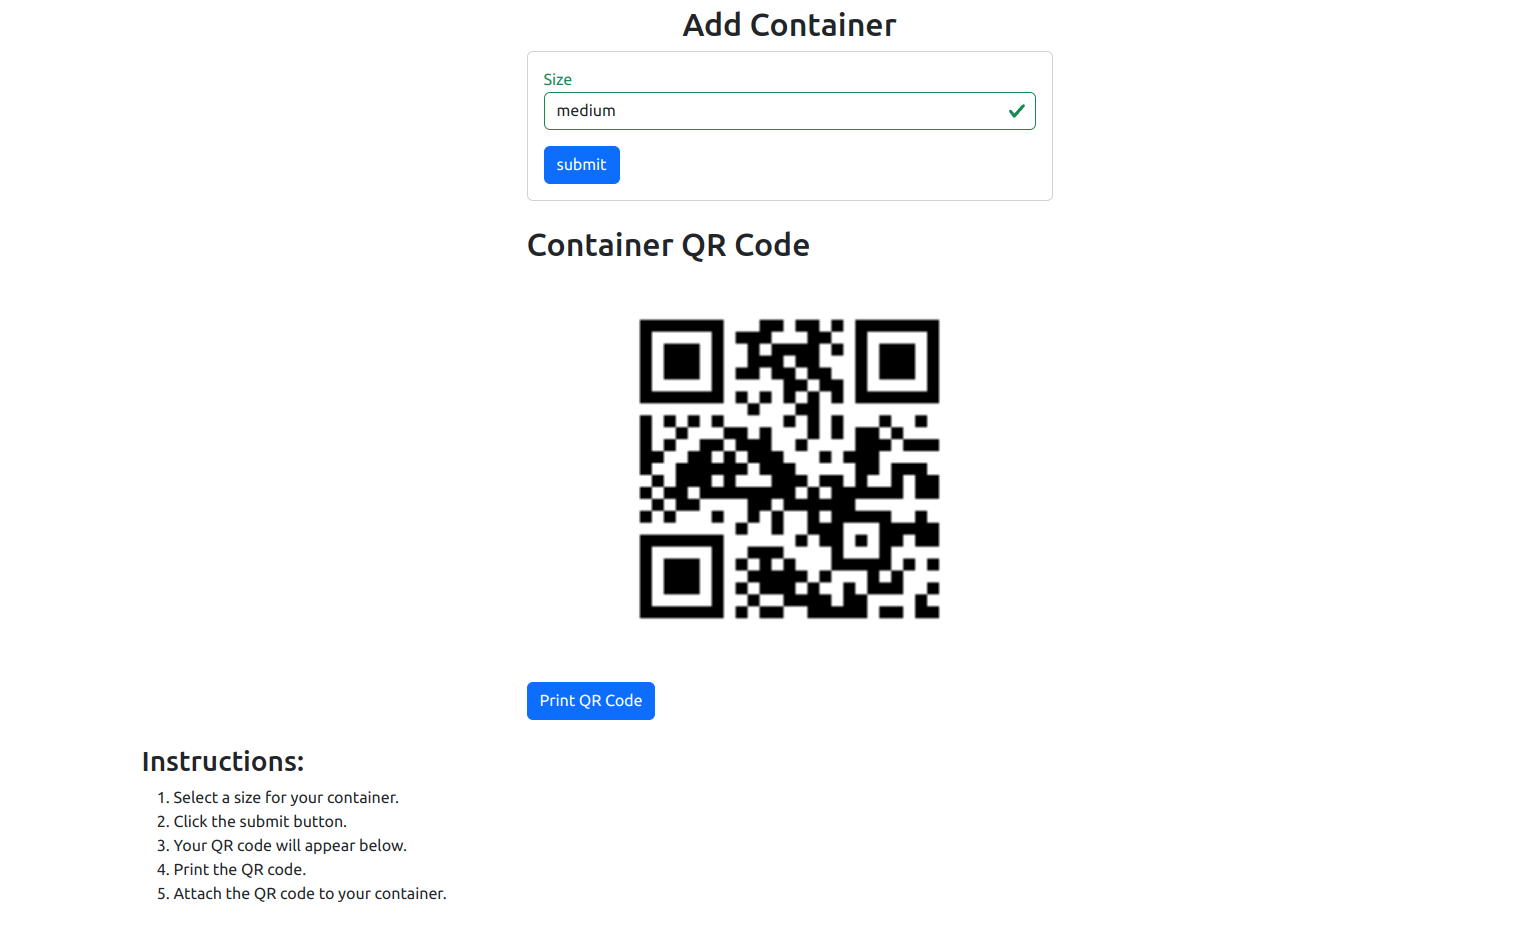
Once submitted, the container will be added to the database and a QR code is generated for the container. A print button is also available to print the QR code for the container.
Charge User Page
On this page, an admin can charge a user for a specific container that is not returned after the end of an event. This charge will be based on the credit card information that the user provided on their account.
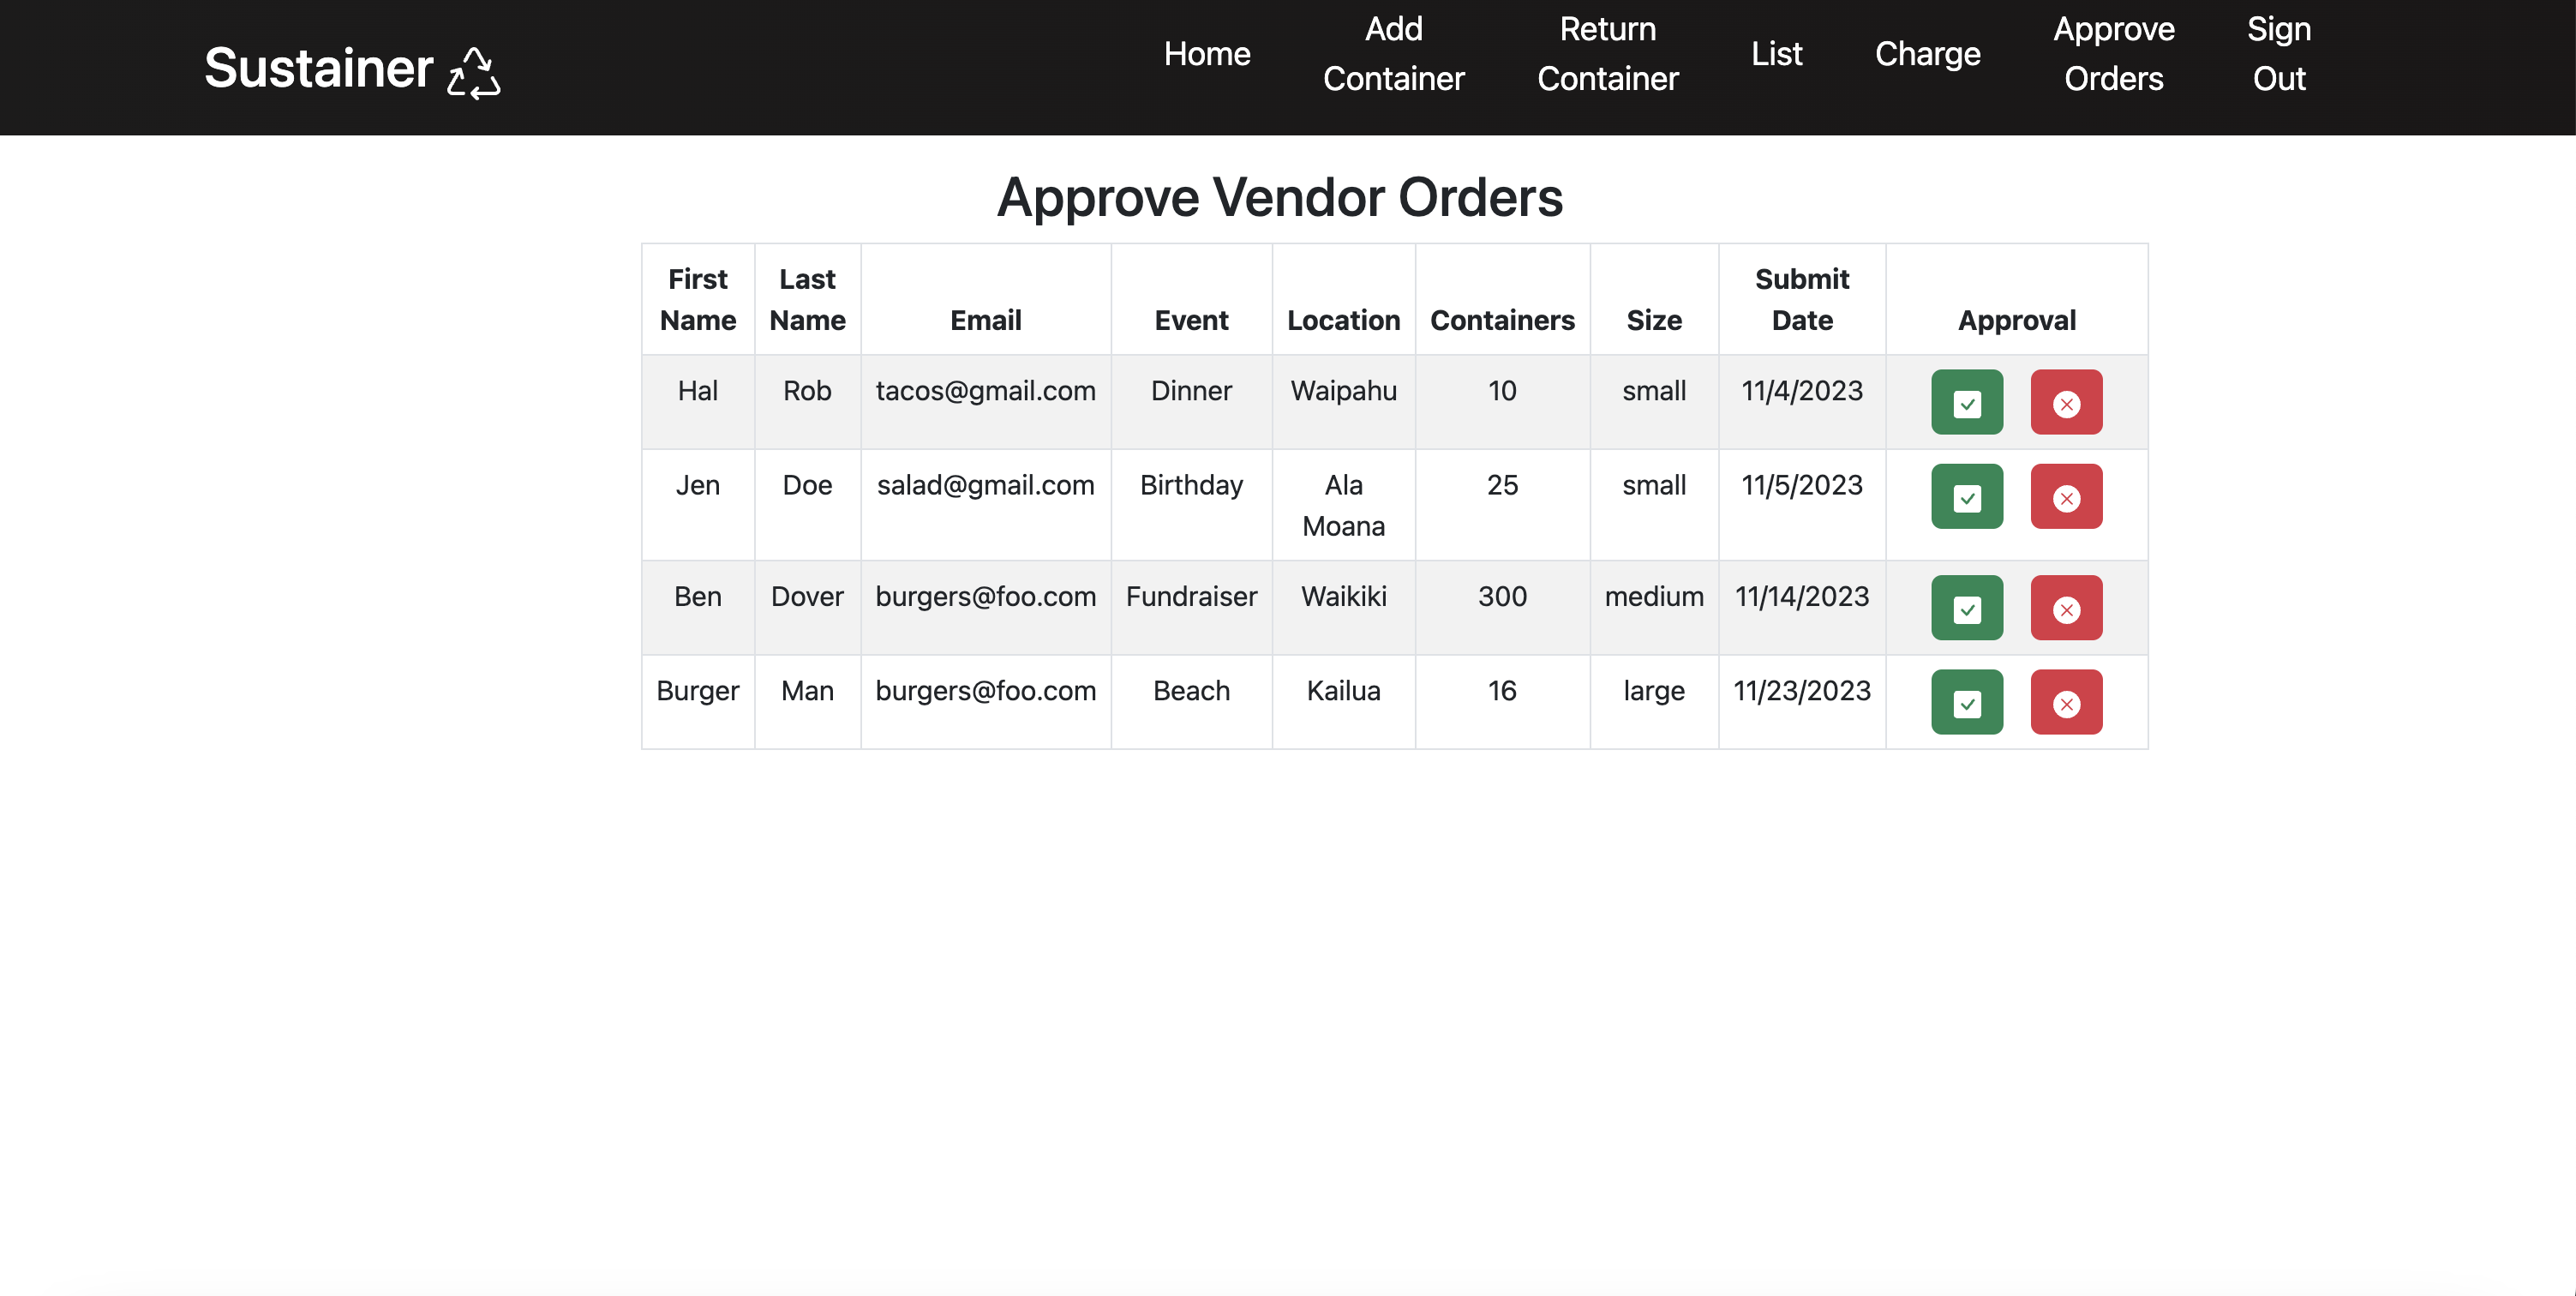
Approve Orders Page
Admin can also approve or reject requested container forms that are created and edited made by a vendor. Once an action is performed, the specific incoming request is removed from the list. The vendor can then see the approval status for each form, as it is updated in real time.
Community Feedback
The following highlights some of the feedback that we received from UH community members on our Sustainer app.
-
“I like the idea behind the app’s functionality. I think that having a QR code scanner for containers is pretty neat. However, it is a little buggy at times. I’m also not sure how reliable connection to the web app will be for outside events.” - UH Math major student
-
“One critique i have is their FAQ boxes could be bigger so its like one of the first things you read especially to know what the QR code is for. But other than that their site is simple to use and does what it needs to. “ - Anonymous
-
“The interface has a very simple design and layout.” - UH Medical student
-
“I found the options for a vendor or admin to be more interesting, though it was quite limited in terms of what I can as a user. In general, I think it’s neat to have an app that is intended and usable towards different types of audiences.” - Former UH student
-
“The approach of achieving sustainability through reusable containers and holding users accountable is unique. This app attempts to solve this problem in both an effective and simple manner.” - UH Community Member
-
“I like the idea that their website is straightforward and effectively serves its purpose. One suggestion is make another button to redirect back to homepage. The landing page has the Full Cycle Takeout program, which is informative to new users.” - Anonymous
-
“My experience with this app from the user’s and admin’s point of view was pretty good. The navbar options was also a little confusing at times, but I like the clean layout and interesting graphics!” - Donator of UH community
-
“Users have noted that while our website’s design is visually appealing and included unique features, there’s a feeling of unpolished in its functionality. Feedback highlights our tailored approach for mobile and desktop platforms, but suggests a need for smoother integration. We acknowledge this valuable input and are committed to refining our features, aiming for a seamless, user-friendly experience that complements our site’s aesthetic appeal.” - Anonymous
-
“The website is neat and simple to look at. I wouldn’t mind using this at events.” - Anonymous
-
“There’s a lot of empty space in parts of the site. I think it would be better to fill it up with more information or designs.” - Anonymous
Developer Guide
Deployment
You can view our deployed app here: https://sustainer.online
The following section provides information of interest to Meteor developers wishing to use this code base as a basis for their own development tasks.
Continuous Integration
![]()
Sustainer uses GitHub Actions to automatically run ESLint and TestCafe each time a commit is made to the default branch. You can see the results of all recent “workflows” at https://github.com/sus-tainer/sustainer/actions.
The workflow definition file is quite simple and is located at .github/workflows/ci.yml.
Installation
First, install Meteor.
Second, visit the Sustainer application GitHub page, and click the “Use this template” button to create your own repository initialized with a copy of this application. Alternatively, you can download the sources as a zip file or make a fork of the repo. However you do it, download a copy of the repo to your local computer.
Third, cd into the sustainer/app directory and install libraries with:
$ meteor npm install
Fourth, run the system with:
$ meteor npm run start
If all goes well, the application will appear at http://localhost:3000.
Development History
The following describes the process of building the app from the design process to code implementation and deployment. Our progress is as follows:
Milestone 1: Identifying Basic User Needs & Mockup Page Development
The goal of Milestone 1 was to create a work flow for the app to identify its main features to solve the problem of user accountability and container retention rate. We focused on creating a mockup of the app’s UI.
Milestone 1 was managed using Sustainer GitHub Project Board M1

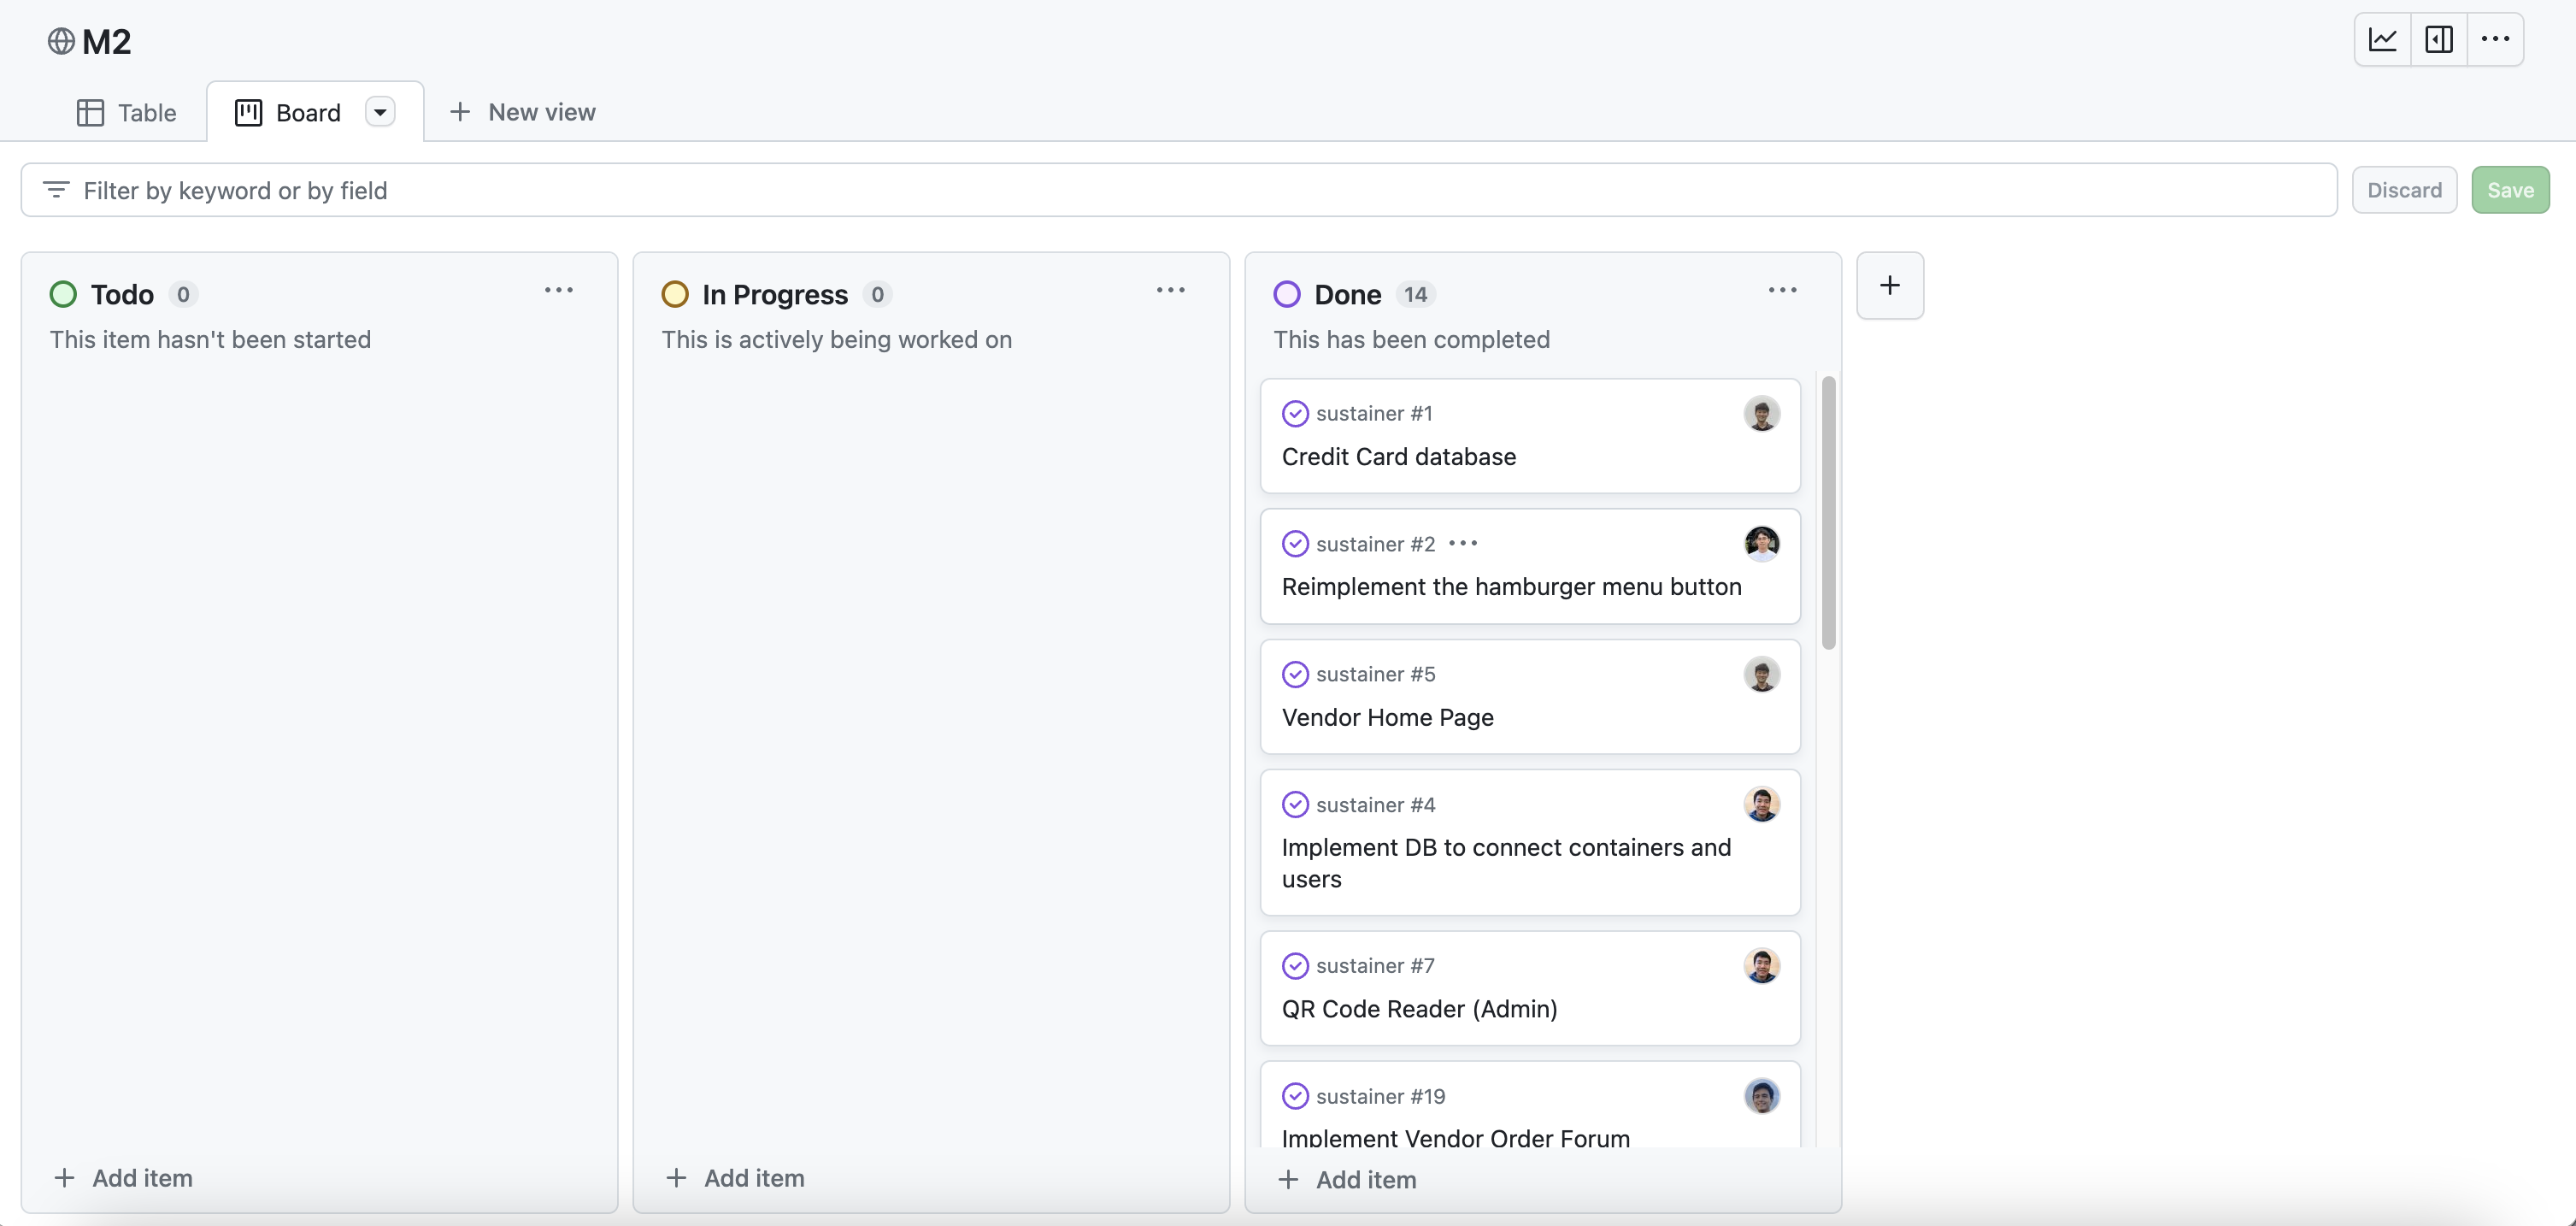
Milestone 2: Basic Skeleton of All Pages, QR Code Functionality
The goal of Milestone 2 was to create all the basic components of the app. For backend, this included implementing all the relational databases properly and ensuring that all functionalities for QR code reading and scanning work properly. For frontend, we focused on creating simple layouts for all the webpages and check that all web pages and nav links in the menu bar navigate correctly based on the role of an account user.
Milestone 2 was managed using Sustainer GitHub Project Board M2
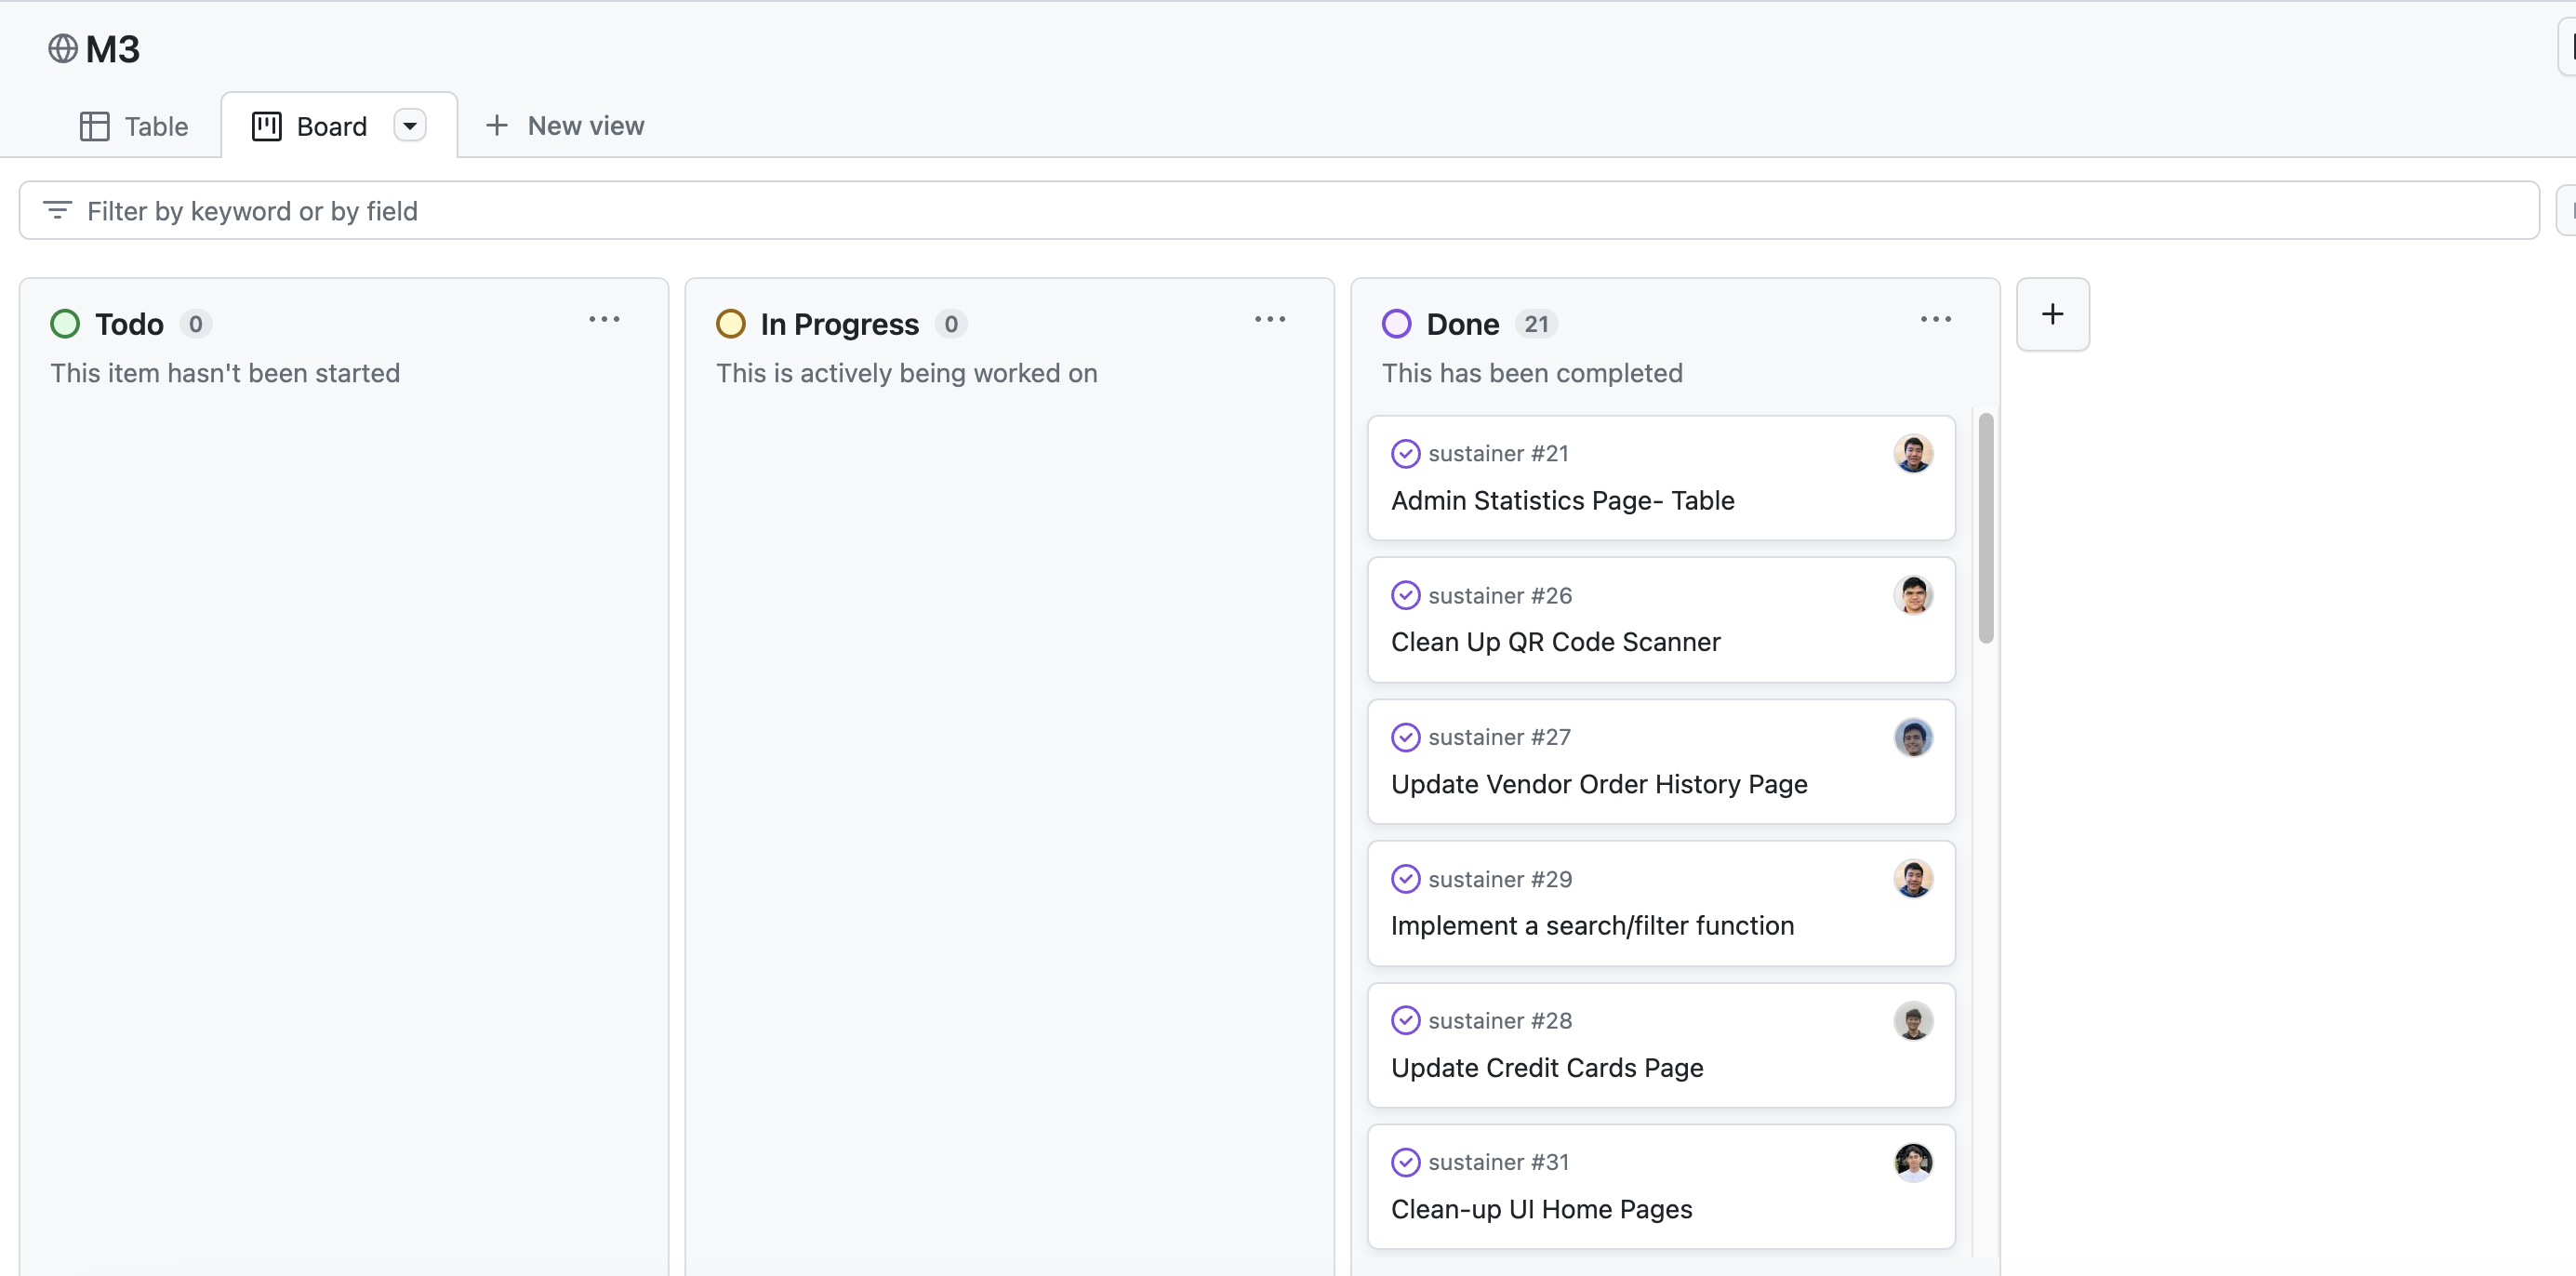
Milestone 3: App Cleanup
The goal of Milestone 3 was to focus on cleaning up the code base, updating UI format, and container ownership transfer. We also focused on implementing the payment portal and payment management. QR code scanning was refined for both the vendor and admin users.
Milestone 3 was managed using Sustainer GitHub Project Board M3
Team
Sustainer is designed and developed by: